Create Push Channels
Push Channels will allow you to poll data from a RSS feed and send any new content to all your users or groups of users via a push notification. This feature will use content generate elsewhere and automatically send remote notifications to users when new items in the feed are available.
To access these pages, expand the Automation menu and click in Push Channels like shown below:

In this page click in the New RSS Feed button:

To create a Push Channel you will need to provide a name:

And the location of the RSS feed:

Optionally you can specify the polling interval for an individual feed. You can also set this interval for all your feeds when configuring this feature in the services pages, as explained here:

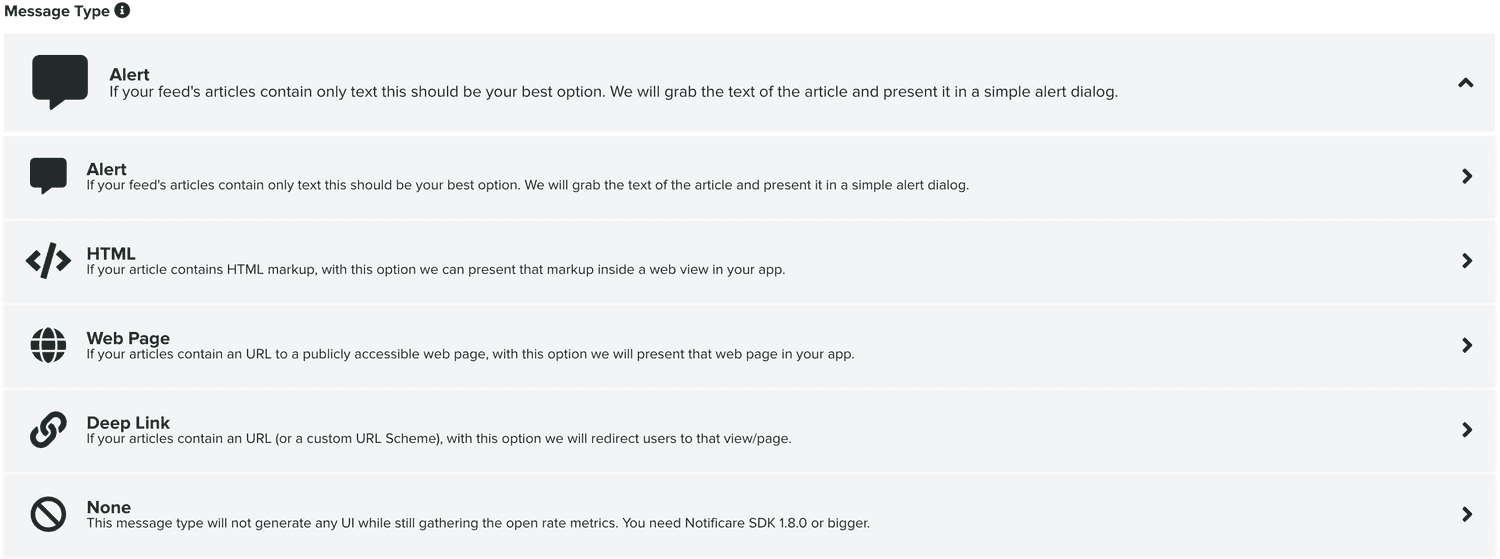
Then you should select the Notification Type, this will define how we use the content of your article in a notification:

If you want to use the link in each article of your feed to present a web page, select Alert as the Notification Type:

If you want to use the content or description in each article of your feed to generate a HTML page, select HTML as the Notification Type:

If you want to use the link in each article of your feed to present a web page, select Webpage as the Notification Type:

If you want to use the link in each article of your feed to present redirect users to a certain page or view in your app, select Deep Link as the Notification Type:

Finally, if you want to use the link in each article of your feed to not present any UI and simply open your website or app, select None as the Notification Type:

Then you can proceed to select what and who will be receive these push notifications. This is done using the Mapping Options:

If you want to send any article of the feed to the same group, select Use entire feed from the Feed Mapping Options:

If your articles have categories and you want to send certain categories of articles to certain groups, select Match with categories of the feed from the Feed Mapping Options:

If you choose the option to send to the entire feed, you will be able to select a custom criteria:

Learn more about how to setup an advanced criteria in our guides located here.
If you choose to match with categories option, you will then be able to select from Tags or Segments. If you select Tags, the following section will be displayed:

Clicking in Add one? will add an entry where you can define which category to use and one of more tags:

You can continue to add more entries using the Add another? button.
If you select Segments, the following section will be displayed:

Clicking in Add one? will add an entry where you can define which category to use and one of more tags:

You can continue to add more entries using the Add another? button.
Before creating your feed, it is a good idea to test it. If you've provided the URL of your feed you can test it by clicking in the Test RSS Feed button:

If everything is OK with your feed, you will see a warning like the one below:

If there is something wrong with your feed you will see an error like this:

When you finished setting up this feed, make sure you click the Create RSS Feed button to save it:

Please note that after creating a feed, by default, the feed will not be active yet. We do this to prevent that Notificare starts polling right away. To activate it, use the switch in each feed in the list of feeds:

Learn how to edit a segment by following the guide located here.