Create Campaigns
In this area you will learn how to create a campaign in Notificare.
From your app's menu, expand the Campaigns menu item and click in New Campaign:

This will take you to the campaign composer, this wizard has initially two different tabs:

Let's start with the Setup tab. Here you can name you campaign as follows:

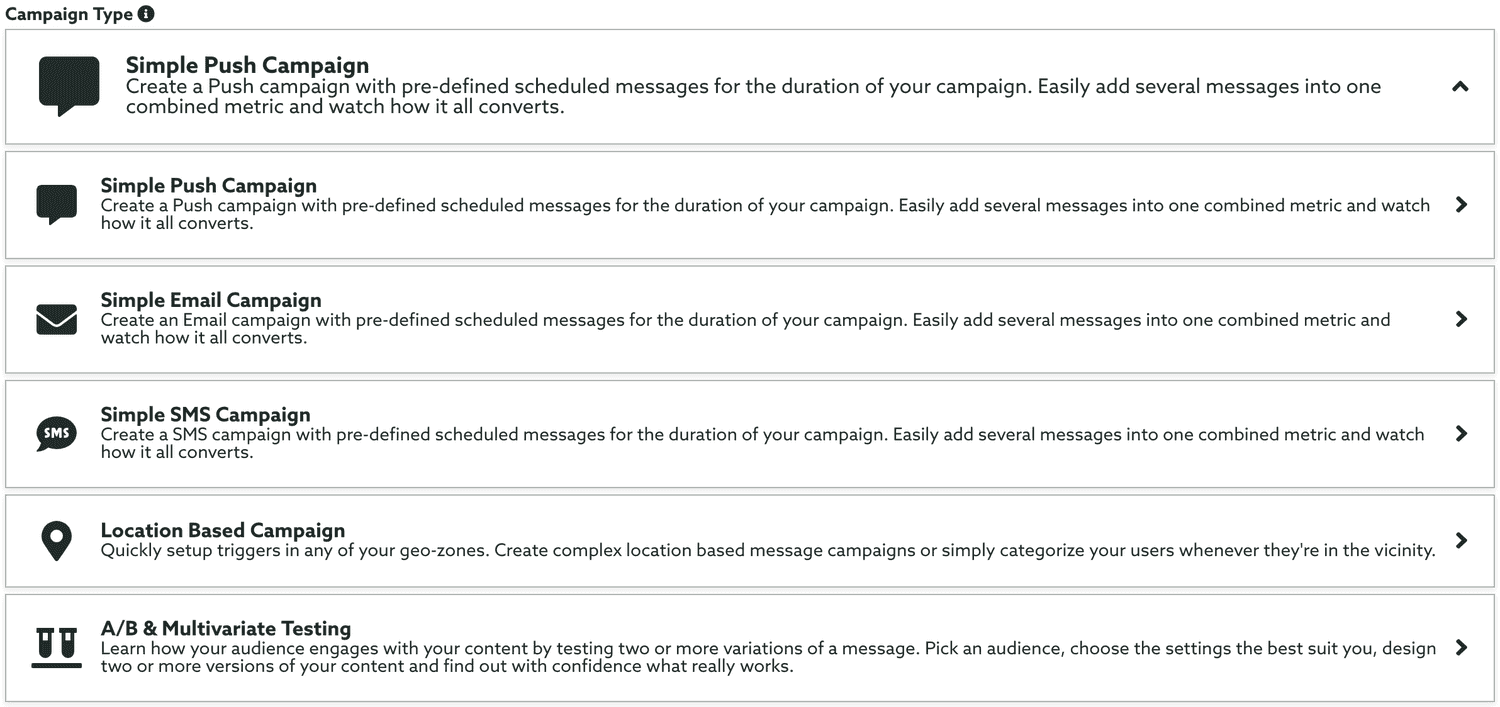
Then let's select which type of campaign you will create, currently we only support Simple Push Campaign, Simple Email Campaign, Simple SMS Campaign and Location Based Campaign (we currently working on adding more types):

Simple Push Campaign
A Simple Push Campaign will allow you to schedule an unlimited number of push messages between a period of time. This type of campaign is the easiest way of grouping several notifications and its results:

For this type of campaign it will be required that in the tab Duration you provide a start and end date:

At this point you should be able to finish the creation of the campaign by simply clicking in the Create button:

Keep reading the guide in this page to learn how to add push notifications to your campaign.
Simple Push Campaign
A Simple Email Campaign will allow you to schedule an unlimited number of email messages between a period of time. This type of campaign is the easiest way of grouping several messages and its results:

For this type of campaign it will be required that in the tab Duration you provide a start and end date:

At this point you should be able to finish the creation of the campaign by simply clicking in the Create button:

Keep reading the guide in this page to learn how to add email messages to your campaign.
Simple SMS Campaign
A Simple SMS Campaign will allow you to schedule an unlimited number of SMS messages between a period of time. This type of campaign is the easiest way of grouping several messages and its results:

For this type of campaign it will be required that in the tab Duration you provide a start and end date:

At this point you should be able to finish the creation of the campaign by simply clicking in the Create button:

Keep reading the guide in this page to learn how to add SMS messages to your campaign.
Location Based Campaign
A Location Based Campaign is the best way of creating geo-fencing push messages in multiple regions with a few steps:

For this type of campaign you can specify if you would like to unify the results, by checking or not the box Combined Stats. Please note that this can't be changed later. If you select a campaign with combined stats you will create one single push message for all the triggers in the campaign:

For this type of campaign it is not required that you provide a Duration, but if you choose to add a time limit to your campaigns you can provide a start and end date:

You can also provide a time range which your triggers will be active during the length of the campaign:

And finally you can also specify if your triggers should be skipped on certain days of the week during the length of the campaign:

Please note that if you provide any duration data for campaign all the triggers you will add later will automatically share this same duration.
At this point you should be able to finish the creation of the campaign by simply clicking in the Create button:

A/B & Multivariate Testing
A A/B & Multivariate Testing is a great way to test the content you send via a Push, Email or SMS message:

If Email or SMS are enabled for your account, you will need to define which medium you would like to use in your test campaign. This can be done by selecting the medium you want to use in the following option:

Optionally you can define which audience you would like to target in your test. This is done in the Audience tab, where you will find a criteria selection component like the one below:

If you do not select any criteria we will consider your whole audience eligible for a test. Learn more about how to setup a criteria in our guides located here.
Also note that when you select a new audience criteria we will test and present you the results which will give you a pretty clear view of how many devices you will reach:

It's important that you select an audience criteria that reaches a considerable amount of devices in order for your test campaign to have the desired result.
You will also need to select which type of test you will perform. This is done via the Settings tab. There are 2 types available for you: Split and Winner. When you choose Split, we will simply equally divide the audience you've selected by the number of different content variations you've created. For that simply select the option Split:

If instead you would like to test your content variations with a smaller group of your audience, wait for the results and send the winner content to the remaining users, then choosing Winner is the option you want to select:

When you select this option, you will need to select what percentage of your audience you would like to use for the sample:

You will also need to provide which wait interval we should use, after sending your variations to the sample group, to analyse the results before rolling out to the winner:

And which metric we should use to eventually calculate the winner:

At this point you should be able to finish the creation of the campaign by simply clicking in the Create button:

Keep reading the guide in this page to learn how to add triggers to your campaign.