Implementation
If you've completed the steps described in the Setup guides, you are now ready to implement our Cordova plugin for iOS in your app. Our plugin supports iOS 9 and up.
To start please make sure you have followed the Getting started with Cordova tutorial. Once you have met all the requirements and you have prepared your machine for Cordova development you can then start implementing our module.
Install the Plugin
cordova plugin add cordova-plugin-notificare-pushAs soon as the plugin is installed, you can open the project's workspace using the following command:
open platforms/ios/MyApp.xcworkspaceWhere MyApp should be the name of your project.
npm install cordova-plugin-notificare-push ionic-native-notificare-pushIf this is the first Ionic Native plugin you've added to your project, you also need to install the Ionic Native core.
npm install @ionic-native/coreAs soon as the plugin is installed, you can open the project's workspace using the following command:
open ios/MyApp.xcworkspaceWhere MyApp should be the name of your project.
Configure your App
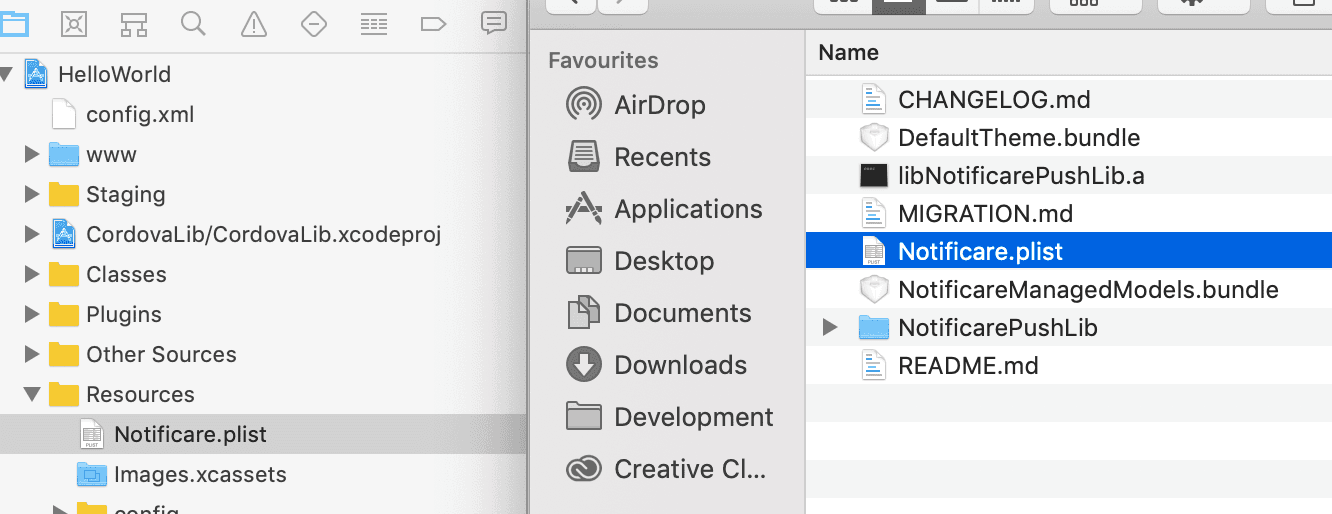
You will need to add some files included in our native library. For that, please download our latest release here. Unzip the downloaded file and open the resulting folder, then drag and drop Notificare.plist into your Xcode project:

It is recommended that you create at least two different apps in Notificare using separated environments for development and production. For each app you will have a different set of keys, these keys should be copied and pasted in the file shown above. The DEVELOPMENT property should be set to YES or NO according to the environment you are building for. You can find your app keys by expanding your app's Settings menu item and clicking in App Keys as shown below:

Copy both the Application Key and Application Secret:

And paste them accordingly in the Notificare.plist file:

Entitlements
Before you can start implementing our library code, you will need to add all the capabilities to your project. Go to your app's target and click in the tab Capabilities:

If you're going to implement remote notifications, add the Push Notifications capability:

If you add the above capability, you also add the Background Modes capability and check the Remote Notifications option:

If you are targeting iOS 15 and using our SDK 2.7 and up, time sensitive notifications require a new capability. Add the Time Sensitive Notifications capability:

If you've subscribed to the Loyalty add-on and you will handle digital cards, then you should add the Wallet capability:

If you've subscribed to the Monetize add-on and you will sell digital products in your app, then you should add the In-App Purchase capability:

If you've subscribed to the Users & Authentication add-on and you will implement OAuth2 features in your app, then you should add the Keychain Sharing capability:

If you are going to implement the NFC Reader capabilities of our library, you must add the Near Field Communication Tag Reading capability:

If you are going to use Dynamic Links, you must add the Associated Domains capability and add all the domain prefixes you've created:

Implementation
You are now ready to start implementing functionality in javascript.
Open your index.js file and add the following inside the deviceready listener:
document.addEventListener('deviceready', function(){

    Notificare.launch();

    Notificare.on('ready', function(app){

    });

    ... more code

}, false);
Open your App component and launch Notificare. If you're using React, you can use the following snippet.
useEffect(() => {
  Notificare.launch();

  Notificare.on('ready', (data) => {

  });
}, []);
At this point, you have completed the basic setup of our library. Keep reading our implementation guides to dive deeper into each feature available in our SDK.