In this area you can set up the Email Service. When configured, Notificare will be able to send email messages on your behalf. You will also be able to configure a localizable opt-in message and opt-in or opt-out landing pages. Please note that this is a pay-as-you-go service, and you will need to buy Email credits before you can start sending messages.
Under the Settings menu, you should start by clicking in Services:

You should then click in the Configure button from the following box:

In this area, you should first provide the domain that you wish to send messages from:

You should own this domain and be able to configure its DNS.
Optionally, you can create a subdomain of viewonline.email by providing an alphanumeric value in the following field:

When created, we will replace every link in your email messages with this domain, allowing you to use this personalization instead of our own domain.
Finally, you should define the sender, by providing the name we will use in the FROM field of your messages:

And the sender address too (must be an email address from the same domain you use):

Finally, once you've provided all the information required, hit the Save button to store your changes:

After saving your changes, you should proceed to configure your DNS. You'll notice that we will immediately check your DNS configuration:

DNS Records
In this area you will get information about all the records you need to add to your domain's DNS provider, in order for us to be able to send email on your behalf.
Go ahead and click the following section:

This will take you to a new page, where you can see all the records you need to add:
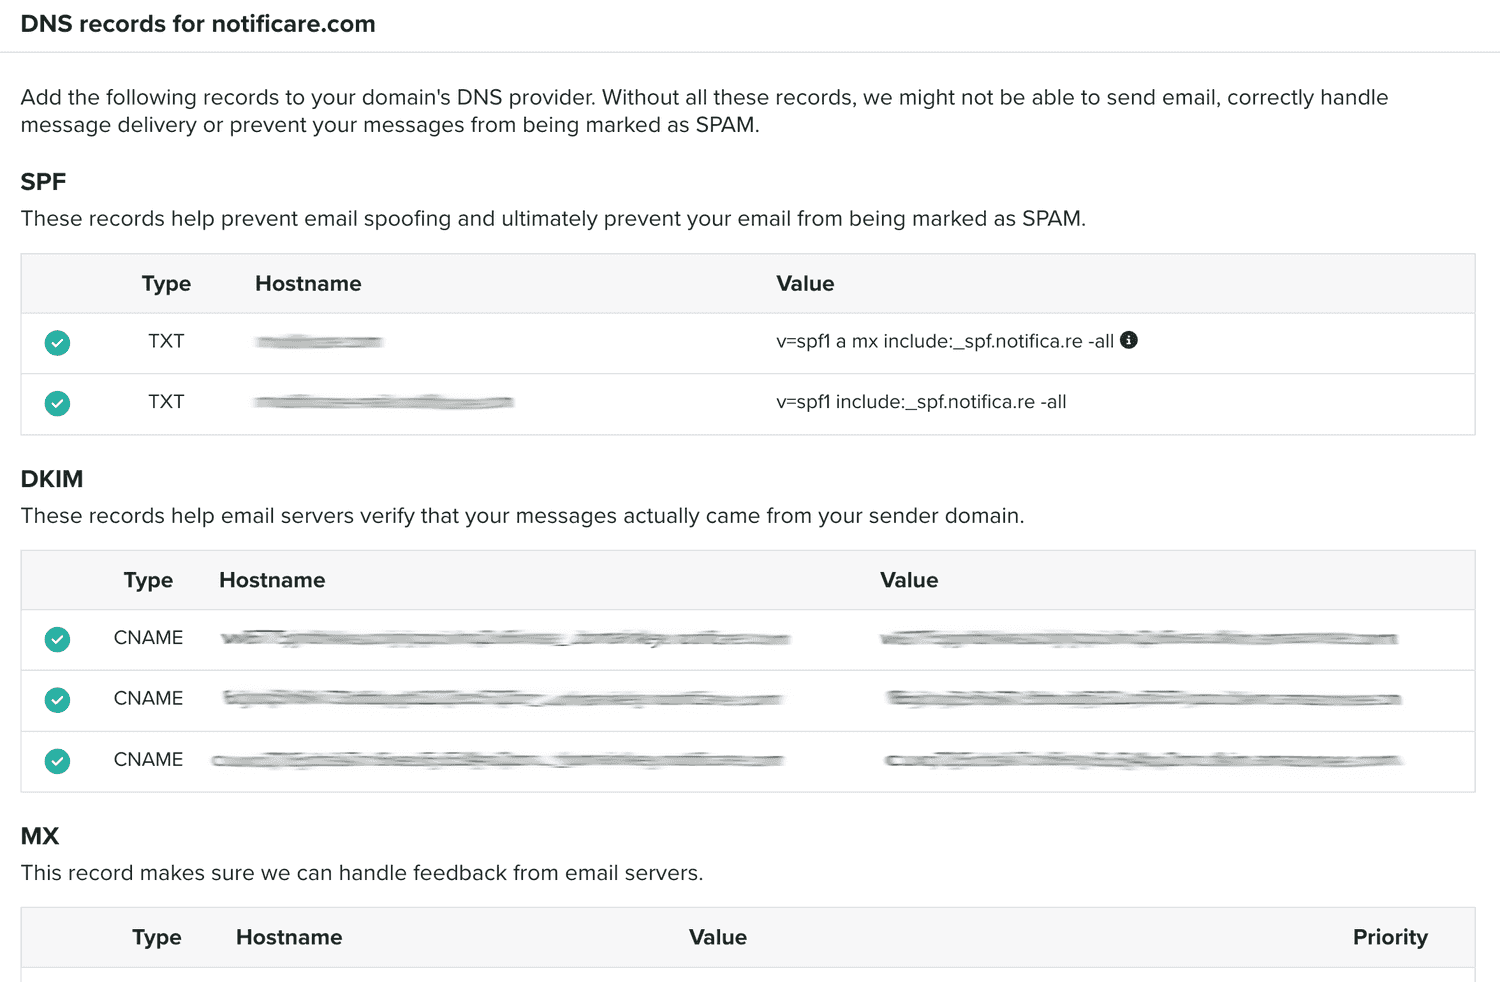
Use these to configure your DNS. If you are not sure about what you have to do, please contact the DNS administrator for your domain, and provide them with this information. You can download a PDF file with this data by clicking in the following button:
After adding these records, in this area, you can also check if each record was added successfully.
You will also notice that your Sender Domain will eventually display as follows (if all records are correctly added):

Once these new DNS records propagate, and your sender domain displays a green check mark, you are ready to start sending email messages.
Opt-in & Opt-out Settings
In this area you can also access your opt-in and opt-out settings page. This is where you'll configure your opt-in email message and landing pages.
Go ahead and click the following section:

This will take you to a new page, where you should start by adding a subject for your opt-in email:

And the body (you should use HTML markup):

In the body, you should include at least a link (<a href="{{validateLink}}">Confirm Opt-in</a>) that will allow your users to confirm their opt-in.
Additionally, you should also provide four different landing pages. Ideally, these must be pages in your own website. We will need a page where we will redirect users after a successful opt-in confirmation:

And a page where we will redirect users when the opt-in confirmation fails for any reason:

Finally, we will also need landing pages for the opt-out confirmation. When you include an unsubscribe link (<a href="{{unsub}}">Unsubscribe</a>), these will be the pages users land when they click that link.
You should then provide a URL for a successful opt-out:

And one when an opt-out fails for any reason:

If you operate in different countries and communicate with your clients in different languages, you can also localize these settings by toggling the following option:

You should then provide the exact same data for each language you add.
Mailing Lists
In this section, you can find an area where you can create Mailing Lists. Mailing Lists help you define a purpose for your email messaging strategy.
Each list should include one or more segmentation rules, where you define the user opt-out behavior when they click the {{unsub}} link or the One-Click List Unsubscribe.
You start by clicking in the following section:

Which will take you to the list of Mailing Lists you've created:

You can delete mailing lists, by clicking the top right button on each row. Please note that if you delete a list used in any of your messages, you will also need to change those messages too. Clicking a row will also allow you to edit the Mailing List.
You can create a new list by clicking in the following button:

This will open the following window:
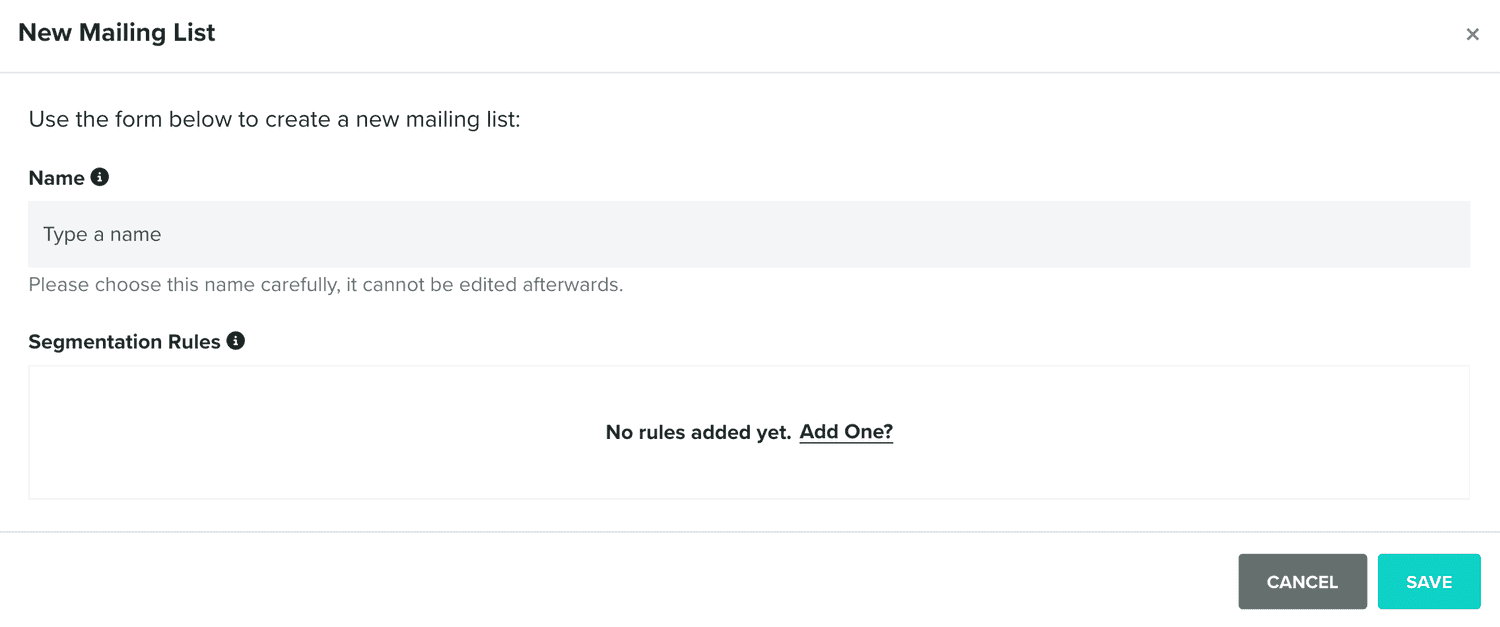
Where you need to provide a name for your list (used as the List-ID header in your messages) and at least one segmentation rule. These rules will be responsible for the opt-out of users from a certain topic:

To learn more about segmentation rules please read this guide.
For example, if you send a message to users with a certain segment or tag, the Mailing List used in that message should remove users from that segment or tag. On the other hand, if your message targets users not in a segment or tag, the Mailing list should add the user to that segment or tag. This prevents you from targeting users in future messages, that unsubscribe from your previous messages.
Subscribe Forms
For your convenience, we provide you with free snippets of code that you can add to your website and easily collect email addresses. Registration via these forms will use the Opt-in and Opt-out Settings, so it's important you define those before using these forms.
You have different types of forms at your disposal:

For each type, you will be able to customize the form as you see fit, in the following section:
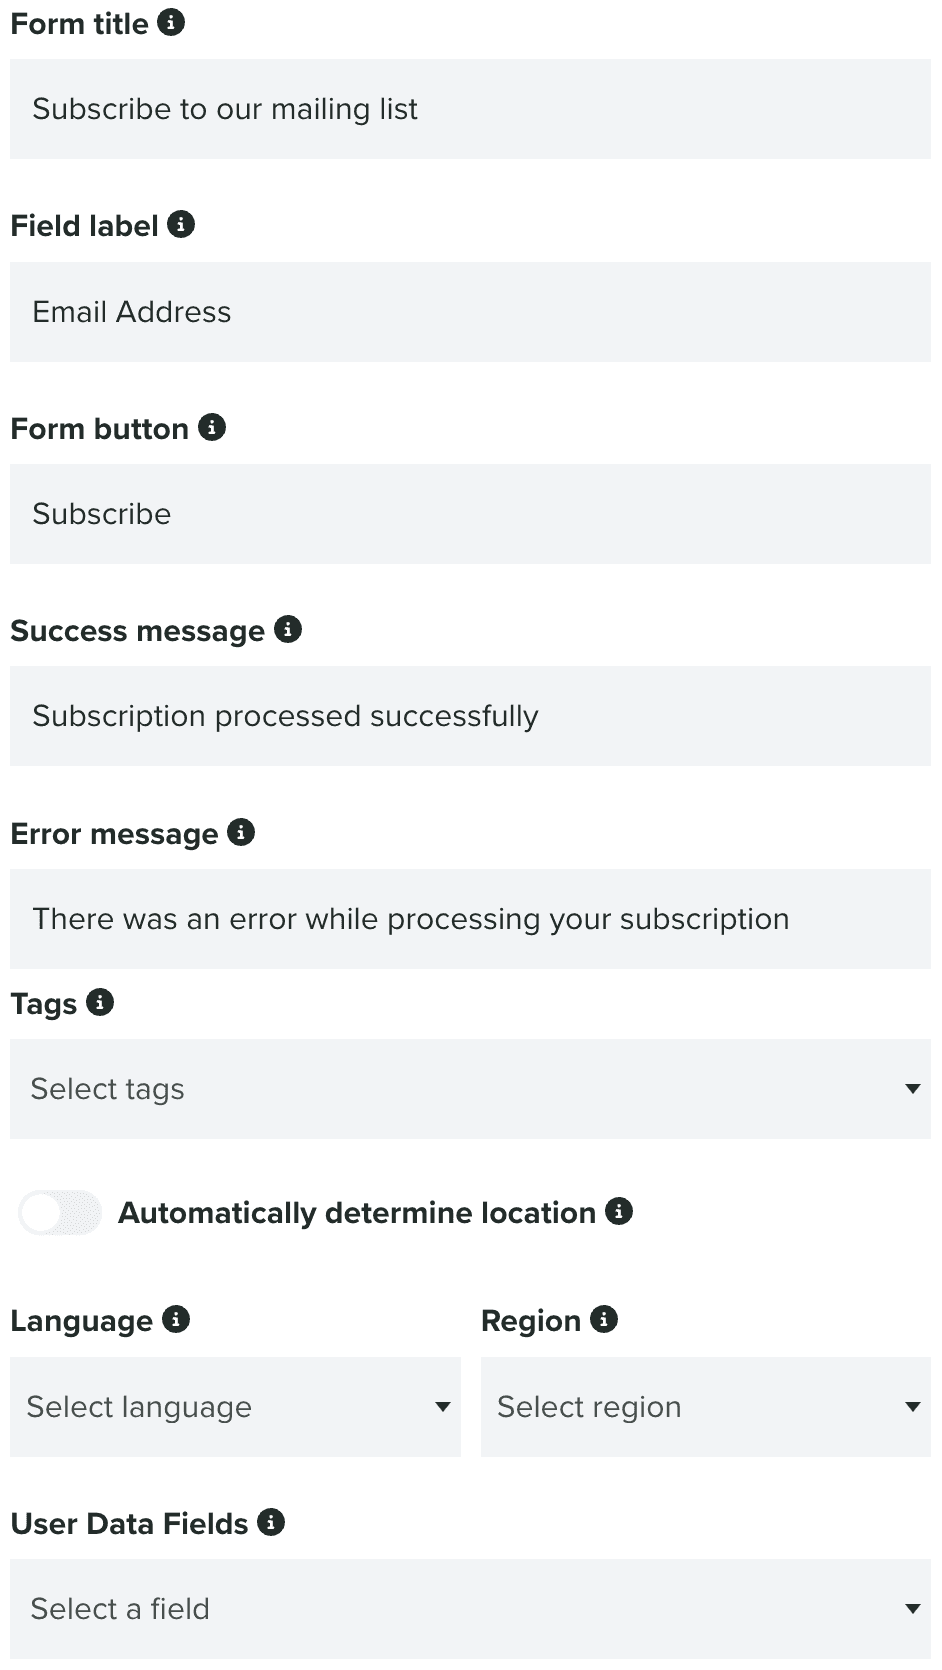
As you customize your form, you can see your changes in the following section:
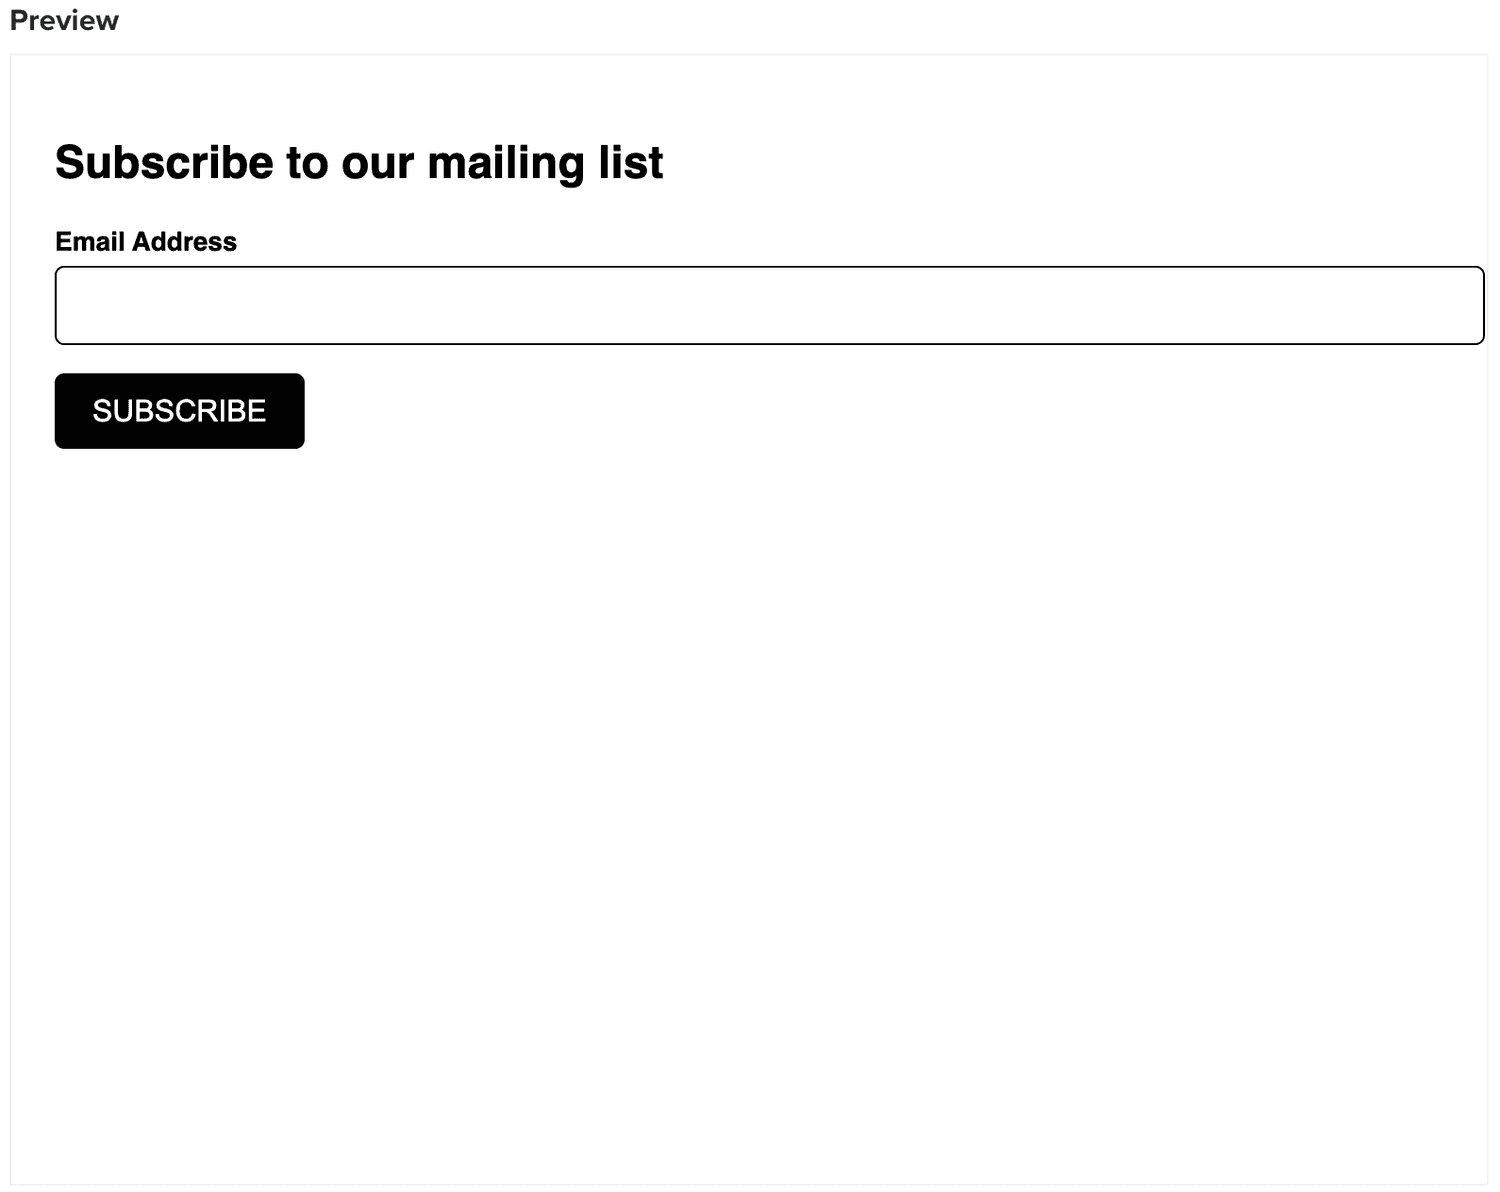
When you satisfied with the form you want to use, you can copy the code in the following area and paste it in your website:
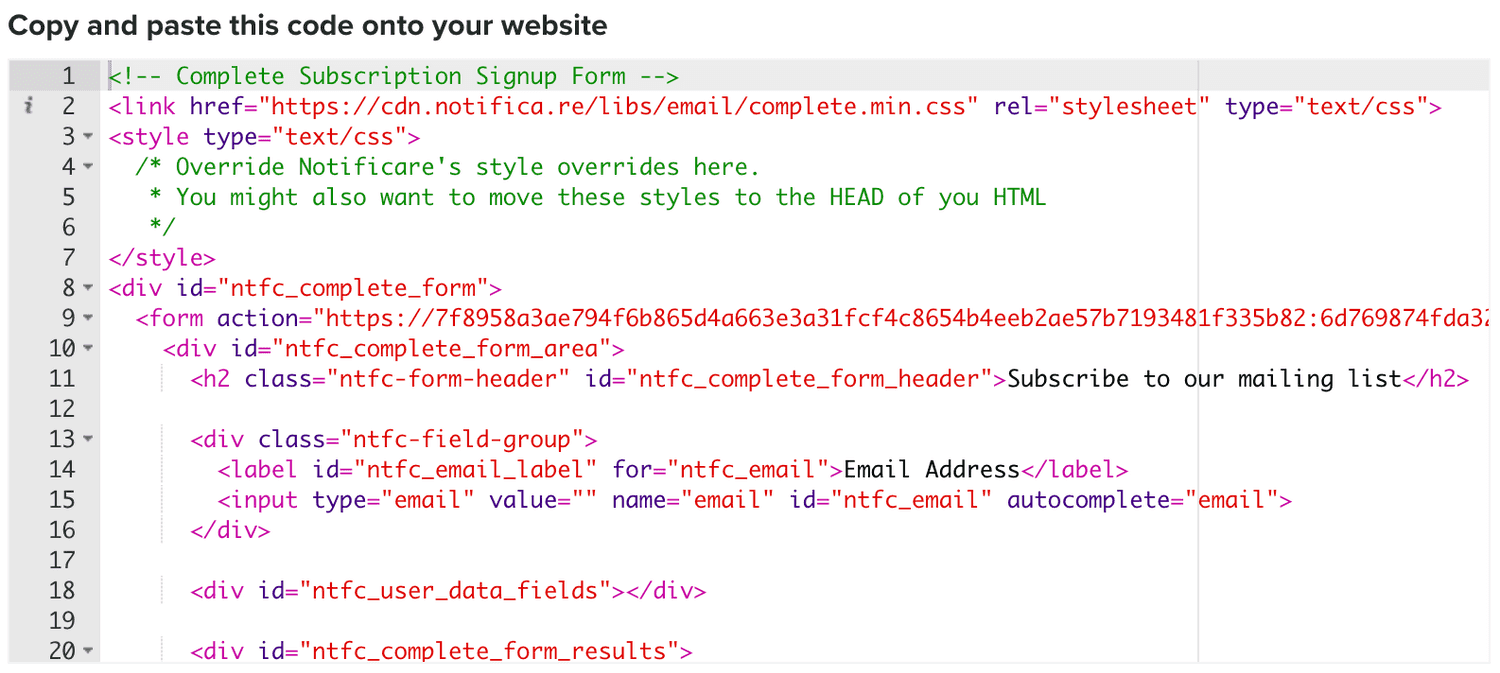
You can still customize it further in your website, after all, this code can be edited and styled using CSS.