Implementation
If you've completed the steps described in the Setup guides, you are now ready to implement our iOS library in your app. Our library supports tvOS 10 up to tvOS 15. Make sure you always have the last Xcode available when using this library.
If you are upgrading from an older version of our library, it's always a good idea to read our Changelog file. If you're migrating from 1.x.x please read the Migration Steps.
Using Cocoa Pods
Cocoa Pods is an Objective-C Library Manager that lets you easily use fat binary libraries in your Xcode project. To simply start using the library just add the following to your Podfile (using vi or any other text editor):
pod 'notificare-push-lib-tvos', '~> 2.5' // make sure you use the latest version availableThen make sure you install the latest pods by running the following command:
pod installAs soon as your pods are installed, make sure you close all sessions of Xcode and open the project's workspace using the following command:
open MyAmazingApp.xcworkspaceWhere MyAmazingApp should be the name of your project. Finally, you will need to manually add the configuration file Notificare.plist to your project. You can get it from here.
Manual Installation
You can also choose to manually import our library to your project. Please download our latest release here. Unzip the downloaded file and drag and drop its contents into your Xcode project:
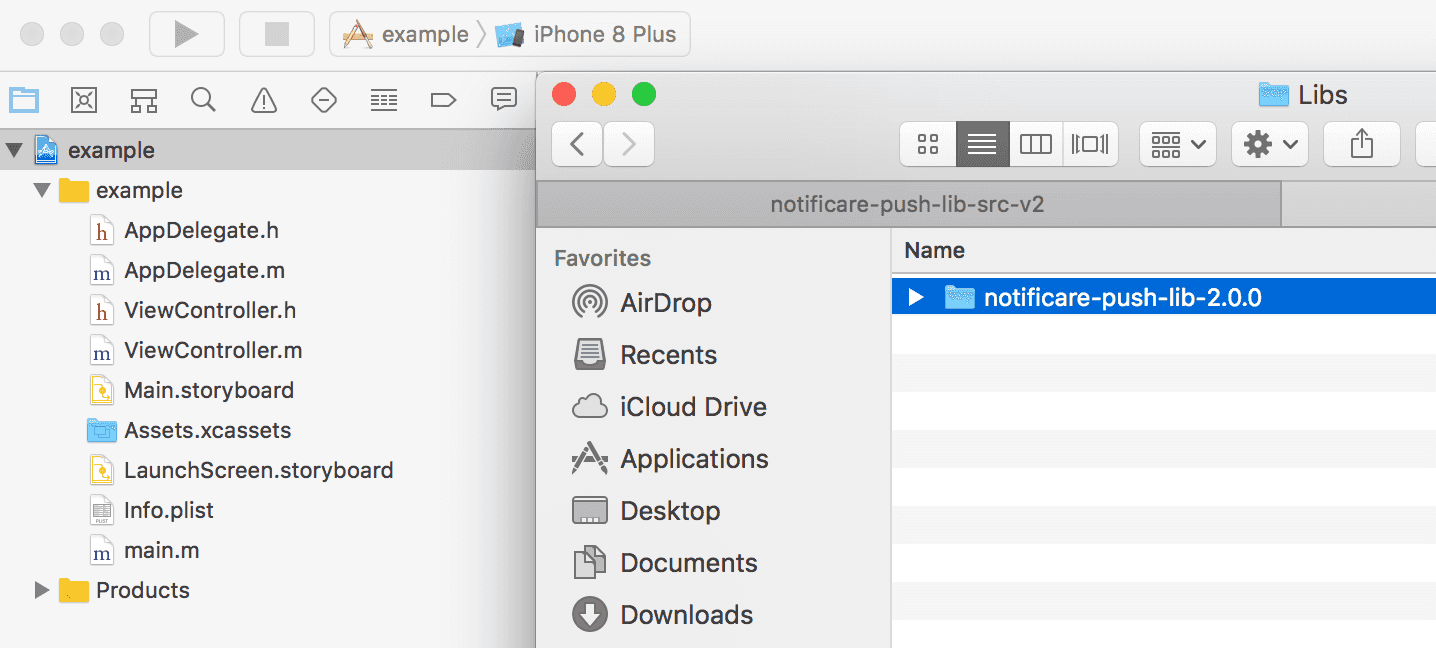
Once you've placed the folder with our library in your project, it will prompt you the following window, make sure you check the Copy items if needed option:
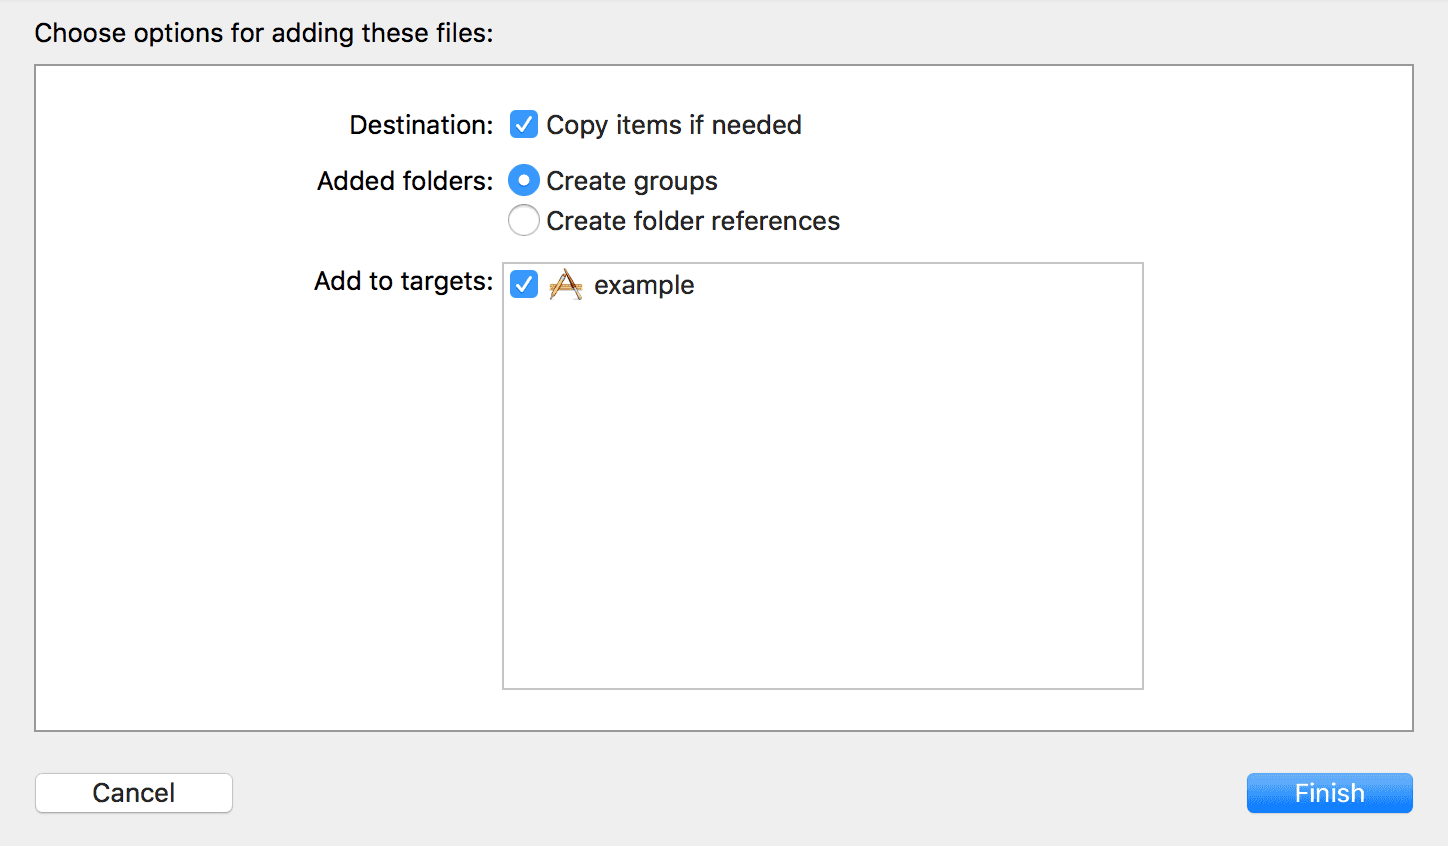
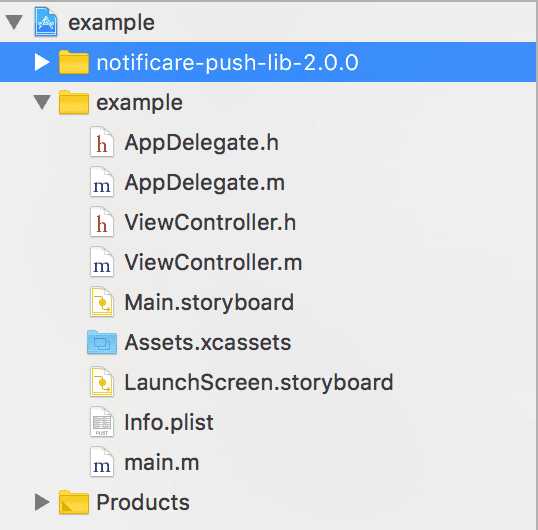
Once you've done that you will see our library inside your project as follows:
Then go ahead and select your app's target and open the Build Phases tab:
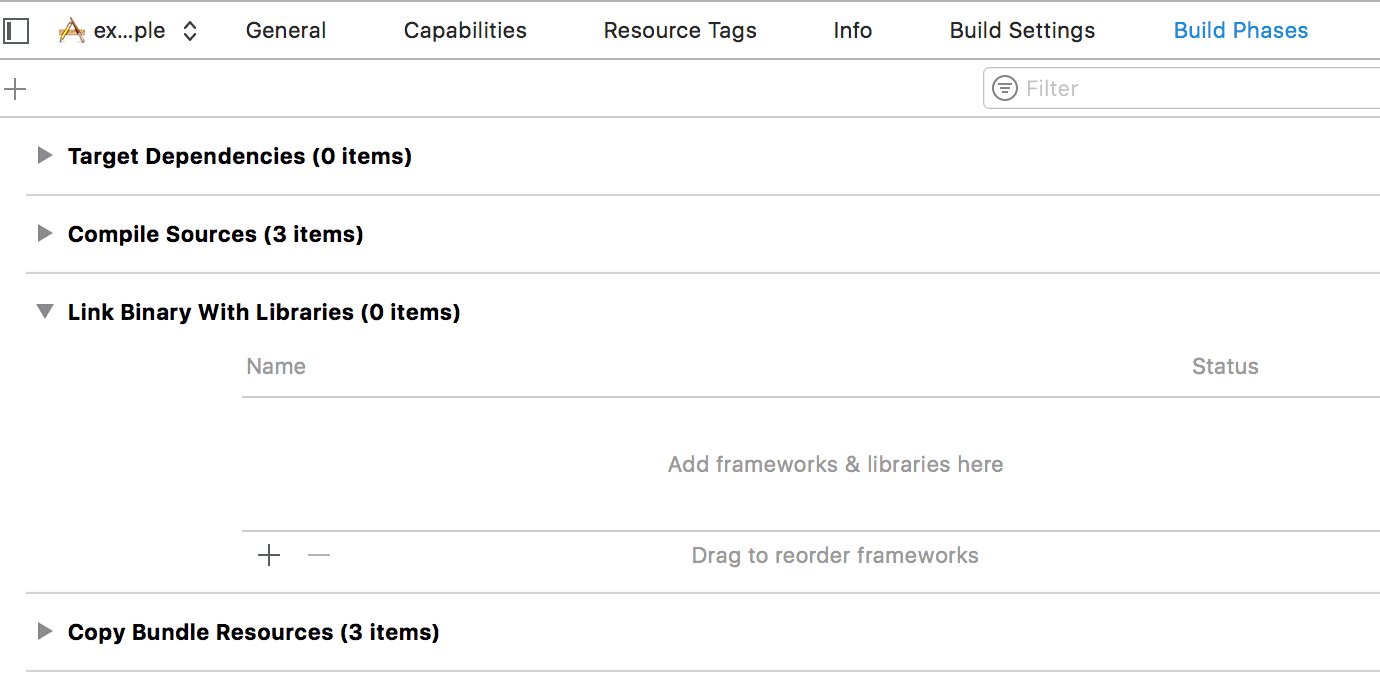
Expand the Link Binary with Libraries section and click in the plus button to start adding the necessary frameworks:
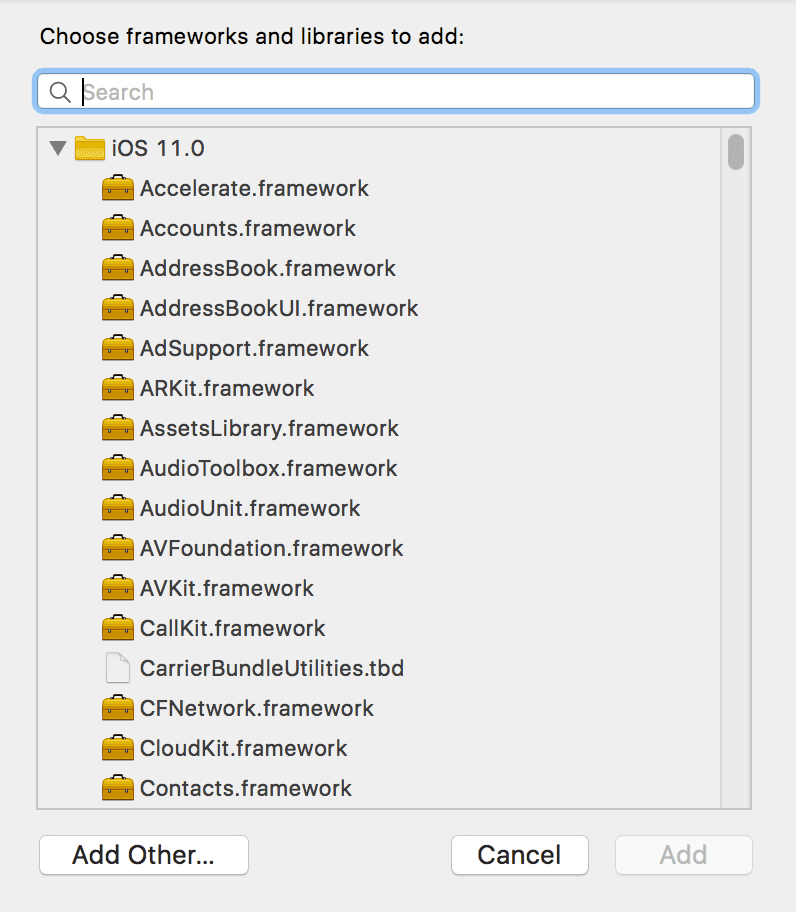
One by one add the following frameworks to your project:
- AVFoundation.framework
- CoreLocation.framework
- CoreData.framework
- UserNotifications.framework
- MobileCoreServices.framework
- libicucore.tbd
- UIKit.framework
- Foundation.framework
- CoreGraphics.framework
- MapKit.framework
- SystemConfiguration.framework
- Security.framework
- CFNetwork.framework
- ImageIO.framework
- StoreKit.framework
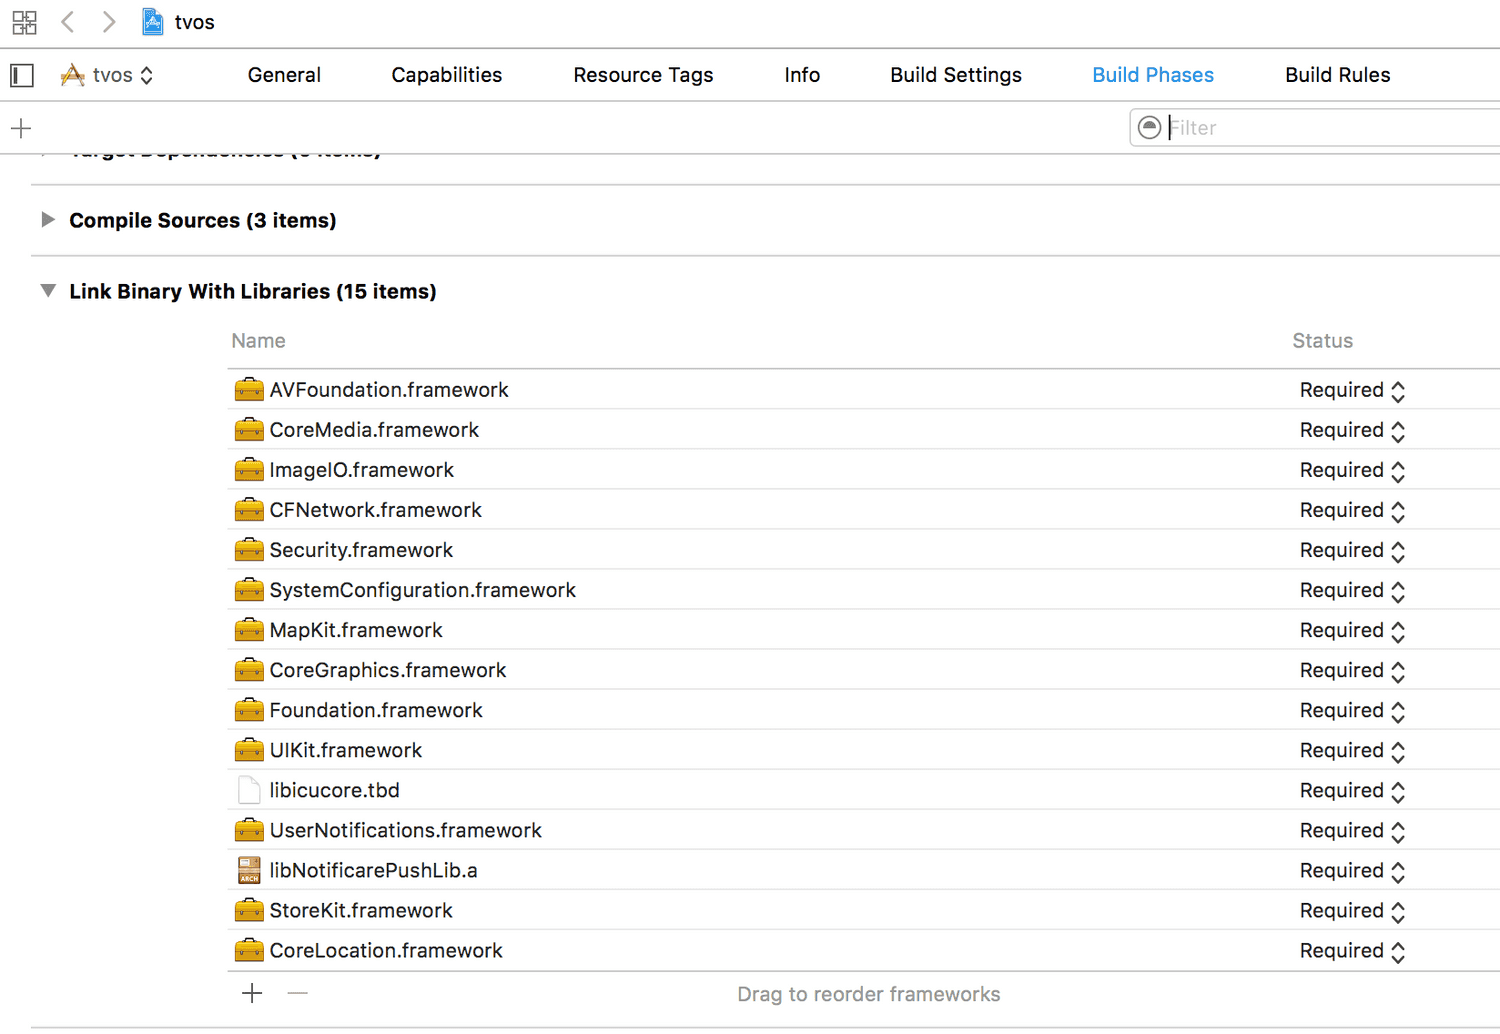
After you've added all these frameworks your Link Binary with Libraries will look like this:
Finally, in your app's target, select the Build Settings tab and search for Other Linker Flags. In that property add -ObjC, like shown below::

Using our library in your Swift app
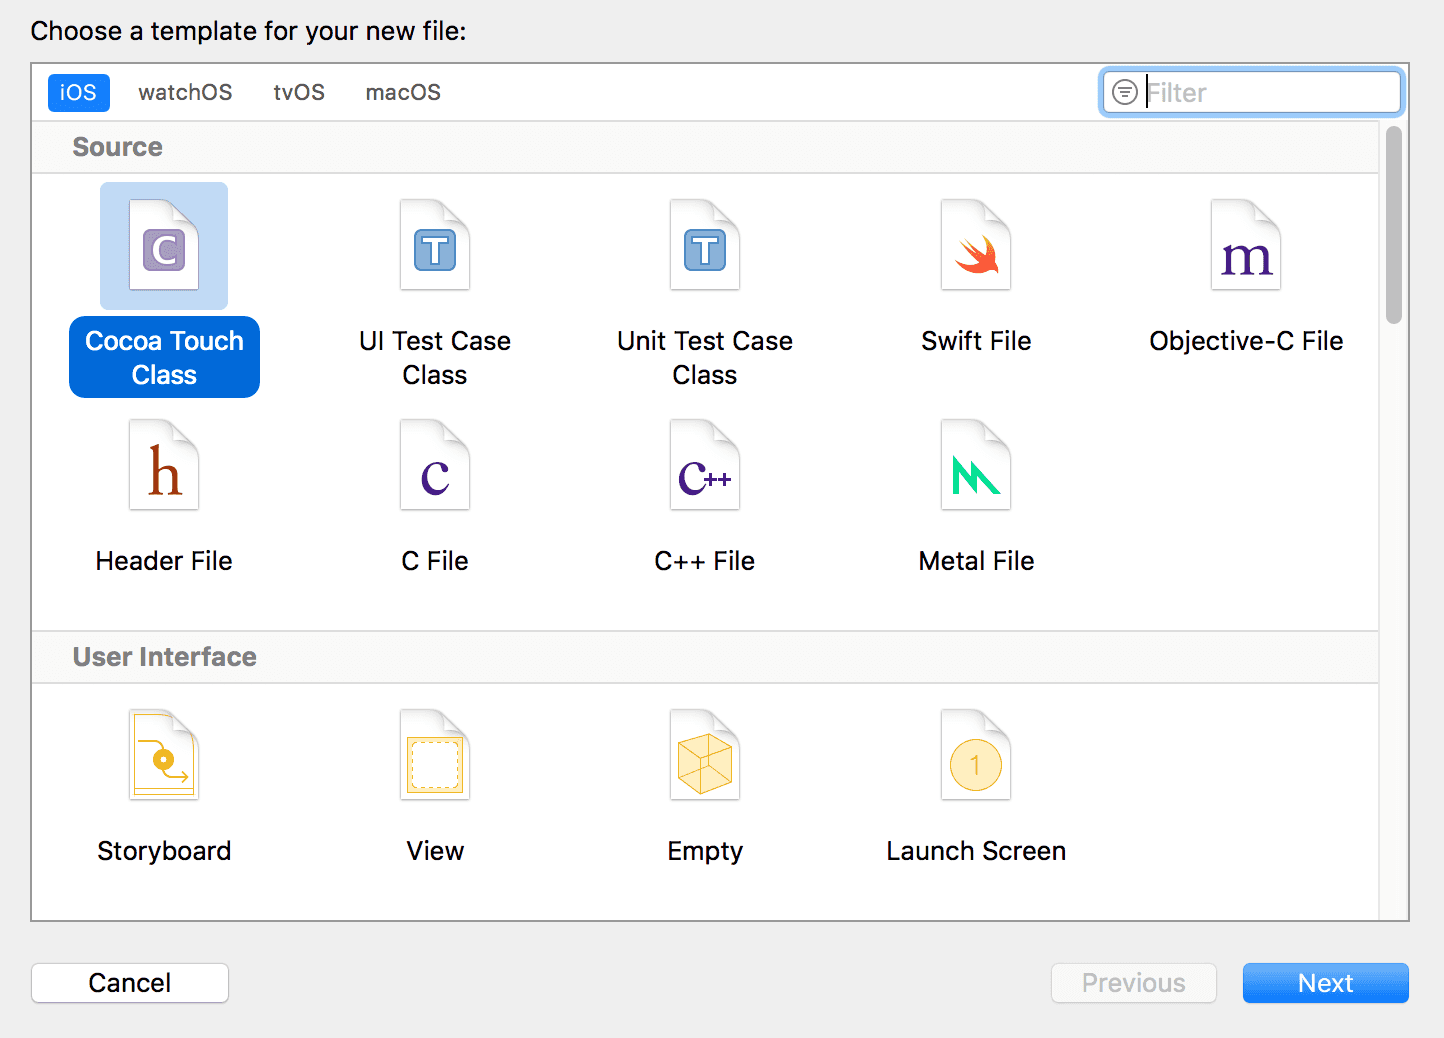
Thanks to Xcode you can easily bridge our Objective-C library and using it in your Swift app. After you have added the frameworks and linker flag in you project, to start using the library in your Swift project simply add a new Cocoa Touch class like shown below:
This will trigger a Xcode dialog like the one below:
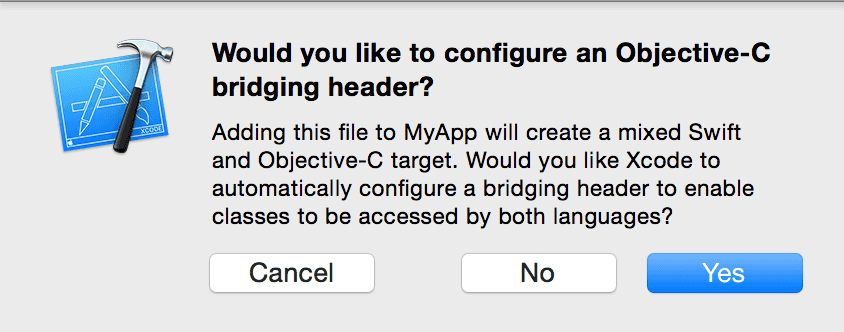
By clicking Yes, Xcode will create a new file with a called AppName-Bridging-Header.h, where AppName corresponds to your own app’s name. You can now delete the Cocoa Touch file you've previously created.
Finally, in your AppName-Bridging-Header.h add the following line:
#import "NotificarePushLib.h"Entitlements
Before you can start implementing our library code, you will need to add all the capabilities to your project. Go to your app's target and click in the tab Capabilities:

Obviously you will need to add Push Notifications by turning the following capability ON:

You should also turn the Remote Notifications background mode ON:

If you've subscribed to the Monetize add-on and you will sell digital products in your app, then you should turn the In-App Purchase capability ON:

Finally make sure you add the Application Key and Application Secret (for both development and production) in the Notificare.plist file:

Import & Launch
In your AppDelegate.h start by importing the library by using the following:
#import "NotificarePushLib.h"When using our library in Swift our library will be already accessible in all your swift files.
Then in your AppDelegate.h or AppDelegate.swift, make sure your declare the protocol NotificarePushLibDelegate, as follows:
@interface MyAmazingAppDelegate : UIResponder <UIApplicationDelegate, NotificarePushLibDelegate>@UIApplicationMain
class AppDelegate: UIResponder, UIApplicationDelegate, NotificarePushLibDelegate{
...more code
}Then in your AppDelegate.m or AppDelegate.swift implement the following:
...more code

- (BOOL)application:(UIApplication *)application didFinishLaunchingWithOptions:(NSDictionary *)launchOptions {

    ...more code

    [[NotificarePushLib shared] initializeWithKey:nil andSecret:nil]; //You can override Notificare.plist keys here
    [[NotificarePushLib shared] setDelegate:self];
    [[NotificarePushLib shared] launch]; // Invoke this method whenever you are ready to start, this will trigger the onReady delegate method


    ...more code
}...more code
func application(application: UIApplication, didFinishLaunchingWithOptions launchOptions: [NSObject: AnyObject]?) -> Bool {
...more code
NotificarePushLib.shared().initialize(withKey: nil, andSecret: nil) //You can override Notificare.plist keys here
NotificarePushLib.shared().delegate = self
NotificarePushLib.shared().launch() // Invoke this method whenever you are ready to start, this will trigger the onReady delegate method
...more code
}And make sure you implement the mandatory delegate method onReady:
...more code

- (void)notificarePushLib:(NotificarePushLib *)library onReady:(nonnull NotificareApplication *)application {
    //At this point you have been assigned a temporary device identifier
    //All services subscribed can be used
}

...more code...more code
func notificarePushLib(_ library: NotificarePushLib, onReady application: NotificareApplication) {
//At this point you have been assigned a temporary device identifier
//All services subscribed can be used
}
...more codeAt this point, you have completed the basic setup of our library. Keep reading our implementation guides to dive deeper into each feature available in our SDK.