Implementation
If you've completed the steps described in the Setup guides, you are now ready to implement our Cordova plugin for Android in your app. Our library is tested up until Cordova 9.0 and supports Android version 4.1 and up, but is only fully functional from version 4.4 (KitKat) up to Android 10 (Q).
To start please make sure you have followed the Getting started with Cordova tutorial. Once you have met all the requirements and you have prepared your machine for Cordova development you can then start implementing our module.
Install the Module
cordova plugin add cordova-plugin-notificare-pushnpm install cordova-plugin-notificare-push ionic-native-notificare-pushIf this is the first Ionic Native plugin you've added to your project, you also need to install the Ionic Native core.
npm install @ionic-native/coreAdd a Notificare Configuration file
In order to connect your app to Notificare, you must create a file platforms/android/app/src/main/assets/notificareconfig.properties with the following contents:
developmentApplicationKey = xxx
developmentApplicationSecret = xxx
productionApplicationKey = xxx
productionApplicationSecret = xxx
production = false
In order to connect your app to Notificare, you must create a file android/app/src/main/assets/notificareconfig.properties with the following contents:
developmentApplicationKey = xxx
developmentApplicationSecret = xxx
productionApplicationKey = xxx
productionApplicationSecret = xxx
production = false
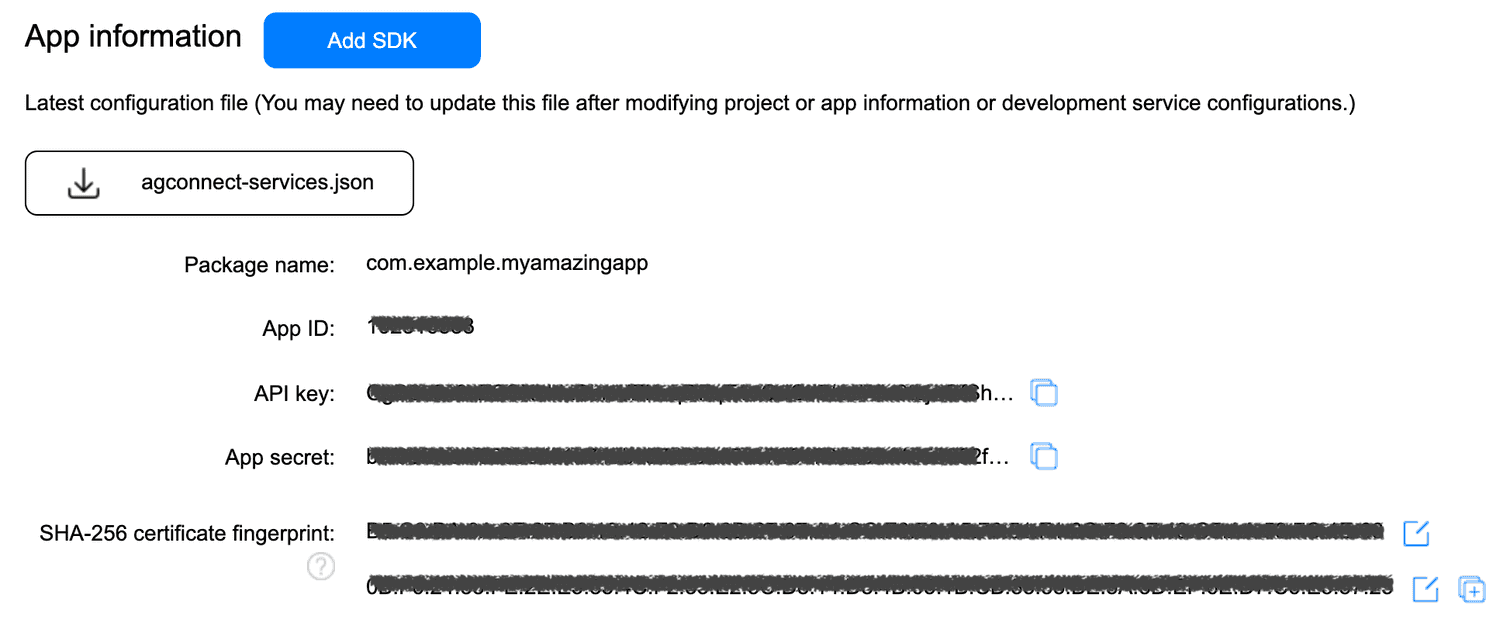
It is recommended that you create at least two different apps in Notificare using separated environments for development and production. For each app you will have a different set of keys, these keys should be copied and pasted in the file shown above. The production property should be changed according to the environment you are building for. You can find your app keys by expanding your app's Settings menu item and clicking in App Keys as shown below:

Copy both the Application Key and Application Secret:

Add Firebase Cloud Messaging
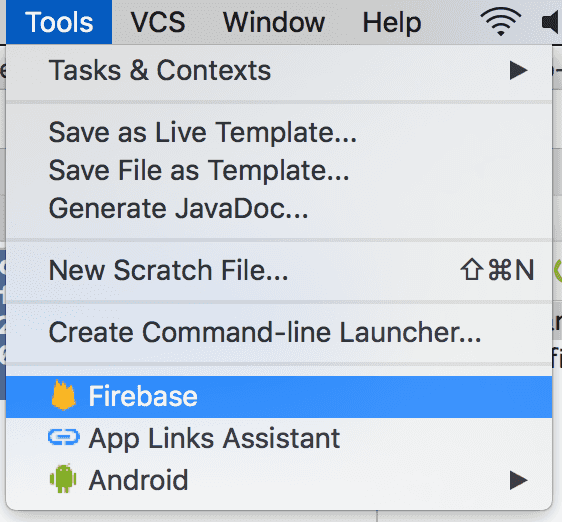
Android Studio makes it easy to quickly import the FCM project you've created previously in your app. Simply expand in Tools menu and click in Firebase:

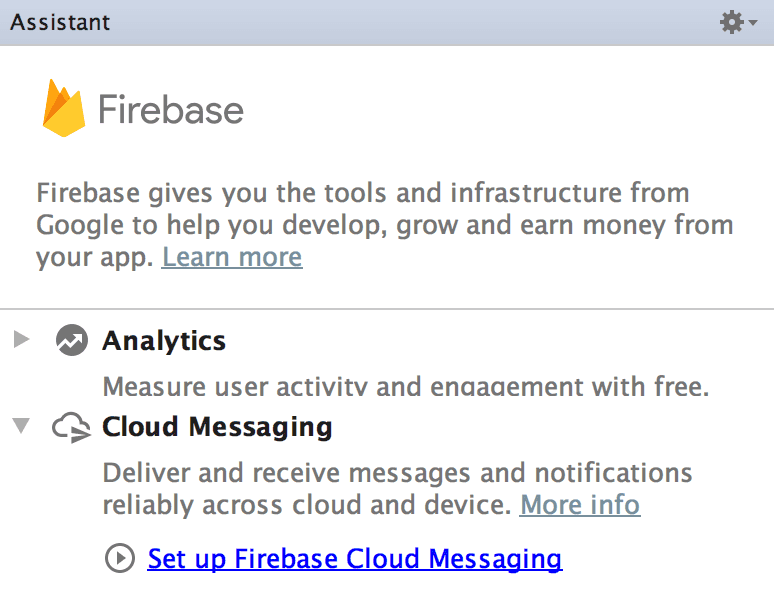
This will open an Assistant window like the one below:

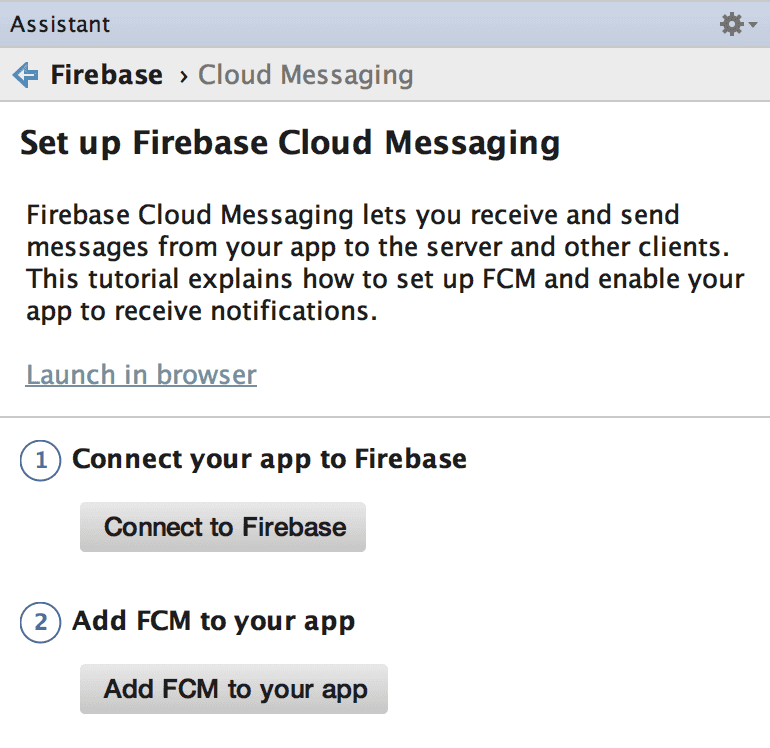
Simply click in the Set up Firebase Cloud Messaging and follow the guides in the following screen:

Completing point 1 and 2 will prepare your app with everything needed to use the FCM project you've previously created. You can confirm if everything is created correctly by checking if a file google-services.json was created. This file resides in /platforms/android/app/google-services.json for Cordova or in /android/app/google-services.json for Ionic Native. It will have the information about the Sender ID of your FCM project.
Android Manifest
It is also necessary to add some configuration in your AndroidManifest.xml file in order to make our plugin work. Locate your Android Manifest file, it should be at /platforms/android/app/src/main/ and make sure that your application has the following:
<application
  android:hardwareAccelerated="true"
  android:icon="@mipmap/ic_launcher"
  android:label="@string/app_name"
  android:name="re.notifica.cordova.BaseApplication"
  android:supportsRtl="true">

  ...more code

</application>
It is also necessary to add some configuration in your AndroidManifest.xml file in order to make our plugin work. Locate your Android Manifest file, it should be at /android/app/src/main/ and make sure that your application has the following:
<application
  android:hardwareAccelerated="true"
  android:icon="@mipmap/ic_launcher"
  android:label="@string/app_name"
  android:name="re.notifica.cordova.BaseApplication"
  android:supportsRtl="true">

  ...more code

</application>
Note the re.notifica.cordova.BaseApplication as the name of your application, if by any chance you already have another class assigned here, make sure you implement the following in your class:
public class MyOwnApplicationClass extends Application {
    @Override
    public void onCreate() {
        super.onCreate();
        Notificare.shared().launch(this);
        Notificare.shared().createDefaultChannel();
        Notificare.shared().setIntentReceiver(IntentReceiver.class);
}
If you want to use an URL Scheme for your app, add it to your strings resources and set an intent filter to your MainActivity:
<intent-filter>
  <action android:name="android.intent.action.VIEW" />
  <category android:name="android.intent.category.DEFAULT" />
  <category android:name="android.intent.category.BROWSABLE" />
  <data android:scheme="@string/app_url_scheme" />
</intent-filter>
You are now ready to start implementing functionality in javascript.
Open your index.js file and add the following inside the deviceready listener:
document.addEventListener('deviceready', function() {

    Notificare.launch();

    Notificare.on('ready', function(app) {

    });

    ... more code

}, false);
Open your App component and launch Notificare. If you're using React, you can use the following snippet.
useEffect(() => {
  Notificare.launch();

  Notificare.on('ready', (data) => {

  });
}, []);
At this point, you have completed the basic setup of our library. Keep reading our implementation guides to dive deeper into each features available in our SDK.
