Implementation
If you've completed the steps described in the Setup guides, you are now ready to implement our Android library in your app. Our library supports Android version 4.1 and up, but is only fully functional from version 4.4 (KitKat) up to Android 10. Make sure you always have the latest Android SDK when using this library.
If you are upgrading from an older version of our library, it's always a good idea to read our Upgrade file.
Add Dependencies
For your convenience we've created a Maven repository that simplifies how you include our library in your app. Open the /app/build.gradle file in your project and add the following entries:
repositories {
    google()
    maven {
        url 'https://maven.notifica.re/releases'
    }
    // maven {
    //     url 'https://maven.notifica.re/prereleases' // if you want to use pre-release versions of the Android SDK
    // }
}
dependencies {
    implementation 're.notifica:notificare-core:2.7.0' // make sure you use the latest version available
    implementation 're.notifica:notificare-location:2.7.0' // if you never gonna use location or geofences, you can leave this one out
    // implementation 're.notifica:notificare-beacon:2.7.0' // only needed if you wanna use beacons
    // implementation 're.notifica:notificare-scannable:2.7.0' // only needed if you wanna use scannable items
}
This will make sure you have the latest Notificare, Google Play and Support libraries.
Add a Notificare Configuration file
In order to connect your app to Notificare, you must create a file /app/assets/notificareconfig.properties with the following contents:
developmentApplicationKey = xxx
developmentApplicationSecret = xxx
productionApplicationKey = xxx
productionApplicationSecret = xxx
production = false
It is recommended that you create at least two different apps in Notificare using separated environments for development and production. For each app you will have a different set of keys, these keys should be copied and pasted in the file shown above. The production property should be changed according to the environment you are building for. You can find your app keys by expanding your app's Settings menu item and clicking in App Keys as shown below:

Copy both the Application Key and Application Secret:

Add Firebase Cloud Messaging
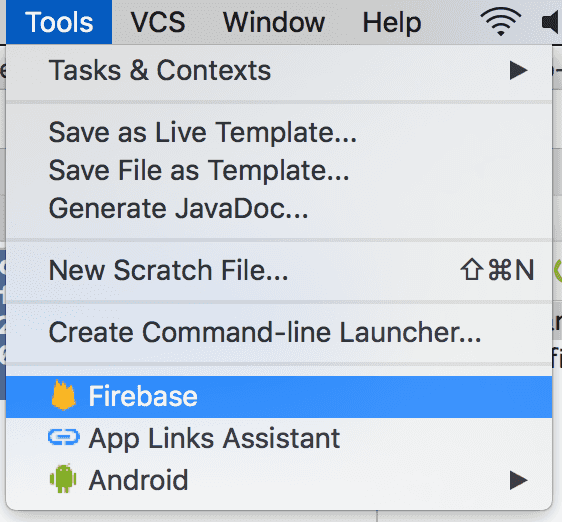
Android Studio makes it easy to quickly import the FCM project you've created previously in your app. Simply expand in Tools menu and click in Firebase:

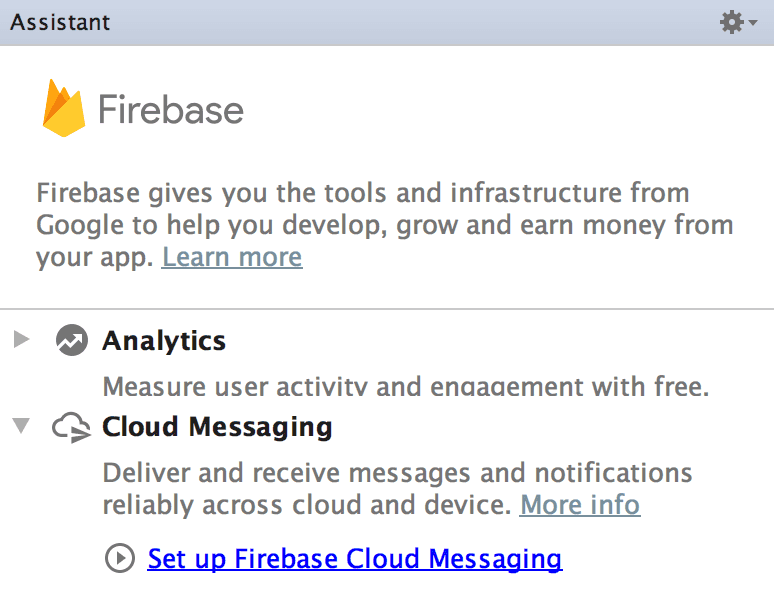
This will open an Assistant window like the one below:

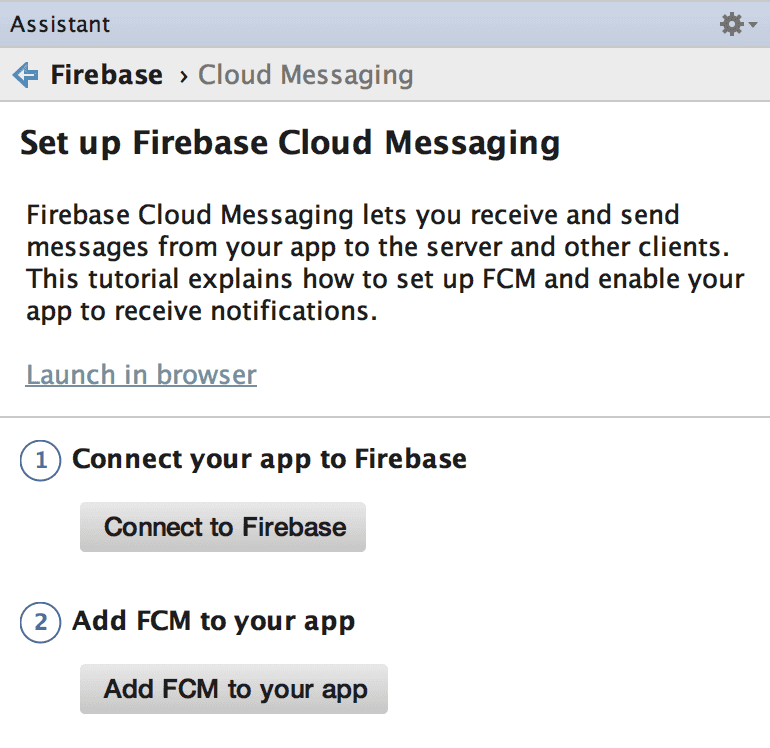
Simply click in the Set up Firebase Cloud Messaging and follow the guides in the following screen:

Completing point 1 and 2 will prepare your app with everything needed to use the FCM project you've previously created.
Now, a file /app/google-services.json should have been created. This file will have the information about the Sender ID of your FCM project.
Add HMS PushKit
In order to use HMS PushKit, you will need to add a dependency on the HMS parts of the Notificare 2.4 SDK.
repositories {
    google()
    maven {
        url 'https://maven.notifica.re/releases'
    }
    // maven {
    //     url 'https://maven.notifica.re/prereleases' // if you want to use pre-release versions of the Android SDK
    // }
}
dependencies {
    implementation 're.notifica:notificare-core:2.7.0' // if your app needs to run on Google Play Services
    implementation 're.notifica:notificare-core-hms:2.7.0' // if your app needs to run on HMS
    implementation 're.notifica:notificare-location:2.7.0' // if you never gonna use location or geofences, you can leave this one out
    implementation 're.notifica:notificare-location-hms:2.7.0' // if you never gonna use location or geofences, you can leave this one out
    // implementation 're.notifica:notificare-beacon:2.7.0' // only needed if you wanna use beacons
    // implementation 're.notifica:notificare-scannable:2.7.0' // only needed if you wanna use scannable items
    // implementation 're.notifica:notificare-scannable-hms:2.7.0' // only needed if you wanna use scannable items
}
You will also need to add HMS AppGallery Connect to your build
In the project's main build.gradle:
buildscript {
    repositories {
        jcenter()
        google()
        maven {url 'https://developer.huawei.com/repo/'}
    }
    dependencies {
        classpath 'com.android.tools.build:gradle:7.0.3'
        classpath 'com.huawei.agconnect:agcp:1.6.0.300'
        classpath 'com.google.gms:google-services:4.3.10'
    }
}

allprojects {
    repositories {
        google()
        maven {url 'https://developer.huawei.com/repo/'}
    }
}
And in your app's build.gradle file, add these lines towards the end of the file:
apply plugin: 'com.google.gms.google-services'
apply plugin: 'com.huawei.agconnect'
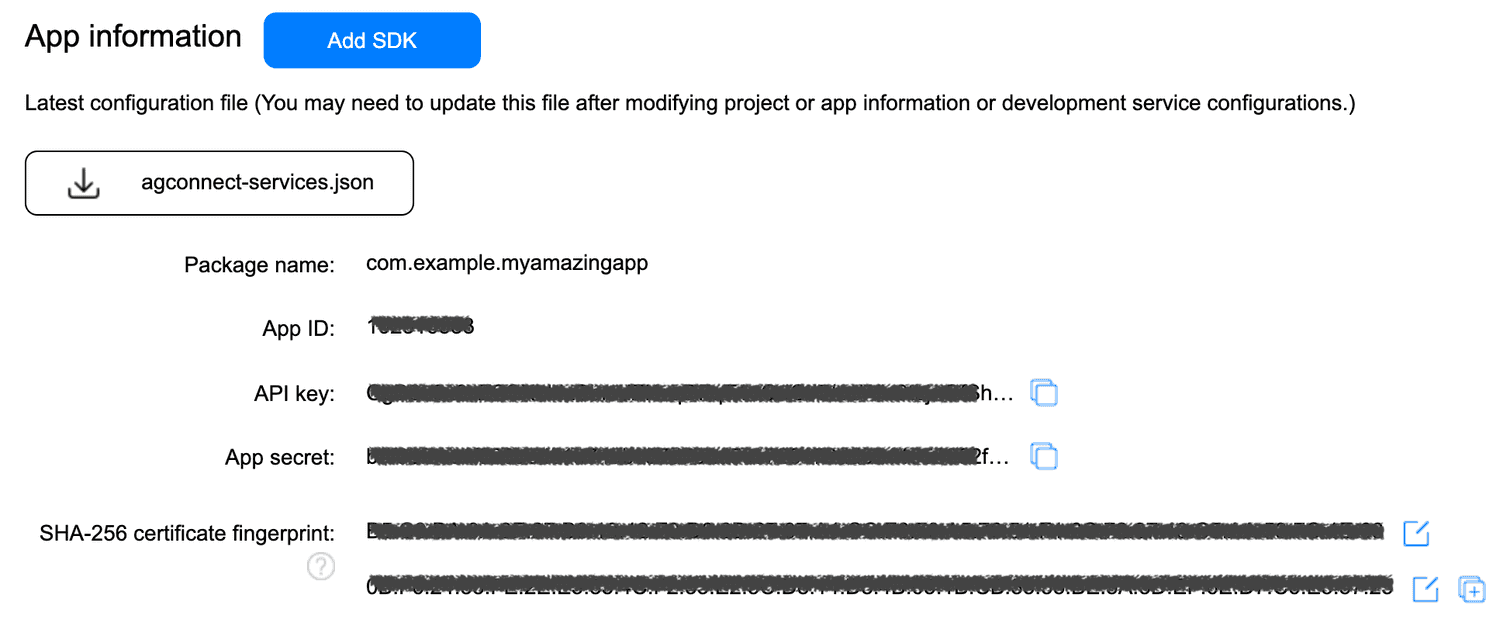
Now, download the agconnect-services.json file from the HMS AppGallery Connect Project Settings to your app folder (same location as the google-services.json file).

Create an Intent Receiver
By default you could simply use the *re.notifica.app.DefaultIntentReceiver class as your Intent Receiver class, but in order to gain more control over Notificare, you will want to create your own Intent Receiver.
This will make sure you can control device registration, notifications received, actions, etc. Go ahead and create a class like the one below:
public class MyIntentReceiver extends DefaultIntentReceiver {

    @Override
    public void onReady() {

        // At this point you have been assigned a temporary device identifier
        // All services subscribed can be used

    }


    @Override
    public void onDeviceRegistered(NotificareDevice device) {

        // At this point you know a device is registered with the Notificare API
        // This method will be called every time something changes, be it token, push enabled/disabled or other property changes
        // Use this method to keep track of device changes in your own app or act on those changes
    }

}
class MyIntentReceiver : DefaultIntentReceiver() {
override fun onReady() {
// At this point you have been assigned a temporary device identifier
// All services subscribed can be used
}
override fun onDeviceRegistered(device: NotificareDevice) {
// At this point you know a device is registered with the Notificare API
// This method will be called every time something changes, be it token, push enabled/disabled or other property changes
// Use this method to keep track of device changes in your own app or act on those changes
}
}Extend Base Application
For exactly the same reasons as you extend the Intent Receiver, you will also want to create your own Application class where you'll be launching Notificare's library, instead of using the re.notifica.app.BaseApplication. This will make sure you can customize the launching options as you see fit for your application. Go ahead and create a class like the one below:
public class MyBaseApplication extends Application {
    @Override
    public void onCreate() {
        super.onCreate();

        // Set debug logging
        //Notificare.shared().setDebugLogging(BuildConfig.DEBUG);
        // Launch Notificare system
        Notificare.shared().launch(this);

        // Crash logs are enabled by default, set it to false to disable them
        //Notificare.shared().setCrashLogs(false);
        // Create and set default channel
        Notificare.shared().createDefaultChannel();

        // Point to your own Intent Receiver
        Notificare.shared().setIntentReceiver(MyIntentReceiver.class);

        // Allow or disallow orientation changes
        Notificare.shared().setAllowOrientationChange(false);

        // Uncomment to use a different icon for notifications
        //Notificare.shared().setSmallIcon(R.drawable.small_icon);

        // Uncomment to use a different accent color for notifications
        //Notificare.shared().setNotificationAccentColor(ContextCompat.getColor(this, R.color.notification_accent_color));

        // Uncommment this to show a notification light by default, even if it isn't sent with the incoming notification
        //Notificare.shared().setDefaultLightsColor("green");
        //Notificare.shared().setDefaultLightsOn(500);
        //Notificare.shared().setDefaultLightsOff(1500);

        // Uncomment these to disable toasts after handling actions or displaying progress during action handling
        //Notificare.shared().setNotificationActivityShowToasts(false);
        //Notificare.shared().setNotificationActivityShowProgress(false);

        // Passbook related configuration:
        Notificare.shared().setPassbookRelevanceOngoing(true);
        // The SDK supports a single optional placeholder, %s.
        // If the placeholder is provided, it will be replaced by the pass description, if any.
        //Notificare.shared().setRelevanceText("Notificare demo: %s");
        //Notificare.shared().setRelevanceIcon(R.drawable.notificare_passbook_style);
    }
}
class MyBaseApplication : Application() {
override fun onCreate() {
super.onCreate()
// Set debug logging
//Notificare.shared().setDebugLogging(BuildConfig.DEBUG)
// Launch Notificare system
Notificare.shared().launch(this)
// Crash logs are enabled by default, set it to false to disable them
//Notificare.shared().setCrashLogs(false)
// Create and set default channel
Notificare.shared().createDefaultChannel()
// Point to your own Intent Receiver
Notificare.shared().intentReceiver = MyIntentReceiver::class.java
// Allow or disallow orientation changes
Notificare.shared().allowOrientationChange = false
// Uncomment to use a different icon for notifications
//Notificare.shared().smallIcon = R.drawable.small_icon
// Uncomment to use a different accent color for notifications
//Notificare.shared().notificationAccentColor = ContextCompat.getColor(this, R.notification_accent_color.colorPrimary)
// Uncommment this to show a notification light by default, even if it isn't sent with the incoming notification
//Notificare.shared().defaultLightsColor = "green"
//Notificare.shared().defaultLightsOn = 500
//Notificare.shared().defaultLightsOff = 1500
// Uncomment these to disable toasts after handling actions or displaying progress during action handling
//Notificare.shared().notificationActivityShowToasts = false
//Notificare.shared().notificationActivityShowProgress = false
// Passbook related configuration:
Notificare.shared().isPassbookRelevanceOngoing = true
// The SDK supports a single optional placeholder, %s.
// If the placeholder is provided, it will be replaced by the pass description, if any.
//Notificare.shared().relevanceText = "Notificare demo: %s"
//Notificare.shared().relevanceIcon = R.drawable.notificare_passbook_style
}
}Handle Notifications
Since Android 12, apps are forced to handle notification opens in an activity. The Notificare Android SDK will launch an intent re.notifica.intent.action.RemoteMessageOpened whenever one is clicked. Your (main) activity will have to handle this intent:
public class MainActivity extends AppCompatActivity {
    @Override
    protected void onCreate(Bundle savedInstanceState) {
        super.onCreate(savedInstanceState);
        handleIntent(getIntent());
    }

    @Override
    protected void onNewIntent(Intent intent) {
        super.onNewIntent(intent);
        Log.i(TAG, "new intent: " + intent.getData());
        handleIntent(intent);
    }

    protected void handleIntent(Intent intent) {
        Uri data = intent.getData();
        if (Notificare.shared().handleTrampolineIntent(intent)) {
            Log.d(TAG, "trampoline intent handled");
        } else {
            // not a RemoteMessageOpened intent, handle the intent as usual
        }
    }

}
class MainActivity : AppCompatActivity() {
override fun onCreate(savedInstanceState: Bundle?) {
super.onCreate(savedInstanceState)
handleIntent(intent)
}
override fun onNewIntent(intent: Intent?) {
super.onNewIntent(intent)
handleIntent(intent)
}
fun handleIntent(intent: Intent?) {
if (Notificare.shared().handleTrampolineIntent(intent)) {
Log.d(TAG, "trampoline intent handled");
} else {
// not a RemoteMessageOpened intent, handle the intent as usual
}
}
}Android Manifest
Finally you need to configure the application and default activities in your Android Manifest file.
Finally make sure your application is declared as follows in your AndroidManifest.xml:
<application
    android:name=".MyBaseApplication"
    android:icon="@drawable/ic_launcher"
    android:label="@string/app_name"
    android:theme="@style/AppTheme">

    <!-- YOUR MAIN ACTIVITY, adopt to fit your needs -->
    <activity
            android:name=".MainActivity"
            android:exported="true"
            android:configChanges="keyboardHidden|orientation"
            android:label="@string/app_name"
            android:launchMode="singleTop">
        <intent-filter>
            <action android:name="android.intent.action.VIEW" />
            <category android:name="android.intent.category.DEFAULT" />
            <category android:name="android.intent.category.BROWSABLE" />
            <data android:scheme="@string/app_url_scheme" />
        </intent-filter>
        <!-- this activity handles the messages opened from NotificationManager -->
        <intent-filter>
            <action android:name="re.notifica.intent.action.RemoteMessageOpened" />
            <category android:name="android.intent.category.DEFAULT" />
        </intent-filter>
    </activity>
    <!-- This will be the notification UI activity -->
    <activity
        android:name="re.notifica.ui.NotificationActivity"
        android:parentActivityName=".MainActivity"
        android:hardwareAccelerated="true"
        android:theme="@style/AppTheme.Translucent">
    </activity>

    <!-- If you are using the loyalty add-on -->
    <activity
        android:name="re.notifica.ui.PassbookActivity"
        android:configChanges="keyboardHidden|orientation|screenSize"
        android:hardwareAccelerated="true">
        <intent-filter>
            <action android:name="android.intent.action.VIEW" />
            <category android:name="android.intent.category.DEFAULT" />
            <category android:name="android.intent.category.BROWSABLE" />
            <data
                android:host="push.notifica.re"
                android:pathPrefix="/pass/forapplication/{notificareAppId}"
                android:scheme="https" />
        </intent-filter>
    </activity>

    <!-- Point to your own Intent Receiver -->
    <receiver android:name=".MyIntentReceiver" />

    <!-- API key for Maps. It is needed when you want to push a map notification type. Get your Maps API Key from your Google API Console -->
    <meta-data
        android:name="com.google.android.maps.v2.API_KEY"
        android:value="GOOGLE_MAP_KEY_HERE" />

    <!-- If you use custom URL Schemes in HTML and Website push notifications, you will want to provide them in this manifest. You will also want to create a resource file with an array of URL Schemes that can be handled in notifications. Any click or events that invoke these URL Schemes will then trigger a method in your custom Intent Receiver -->
    <meta-data
        android:name="re.notifica.metadata.UrlSchemes"
        android:resource="@array/url_schemes" />


</application>
As you can see, this example adds a translucent style to the NotificationActivity to allow it to show alerts floating over your main content, you will need to set up styles for this in your app's theme, e.g.:
<style name="AppTheme.Translucent" parent="AppTheme">
    <item name="android:windowIsTranslucent">true</item>
    <item name="android:windowBackground">@android:color/transparent</item>
</style>
At this point, you have completed the basic setup of our library. Keep reading our implementation guides to dive deeper into each features available in our SDK.