Implementation
If you've completed the steps described in the Setup guides, you are now ready to implement our React Native iOS library in your app. Our library is tested up until React Native 0.59 and should be used with Xcode 10.
To start please make sure you have followed the Getting started with React Native tutorial. Once you have met all the requirements and you have prepared your machine for React Native development you can then start implementing our module.
Install the Module
Open the command line under your project root directory and execute the following command:
react-native install notificare-push-lib-react-nativeThis should install our NPM package and link the native library. If you do not get any errors, you can then proceed with the rest of the implementation. If you face any problems after a successful installation please take a look at our troubleshooting page located here.
Configure your App
You will need to add some files included in our native library. For that, please download our latest release here. Unzip the downloaded file and open the resulting folder, then drag and drop Notificare.plist, NotificareTags.plist, DefaultTheme.bundle and NotificareManagedModels.bundle into your Xcode project:
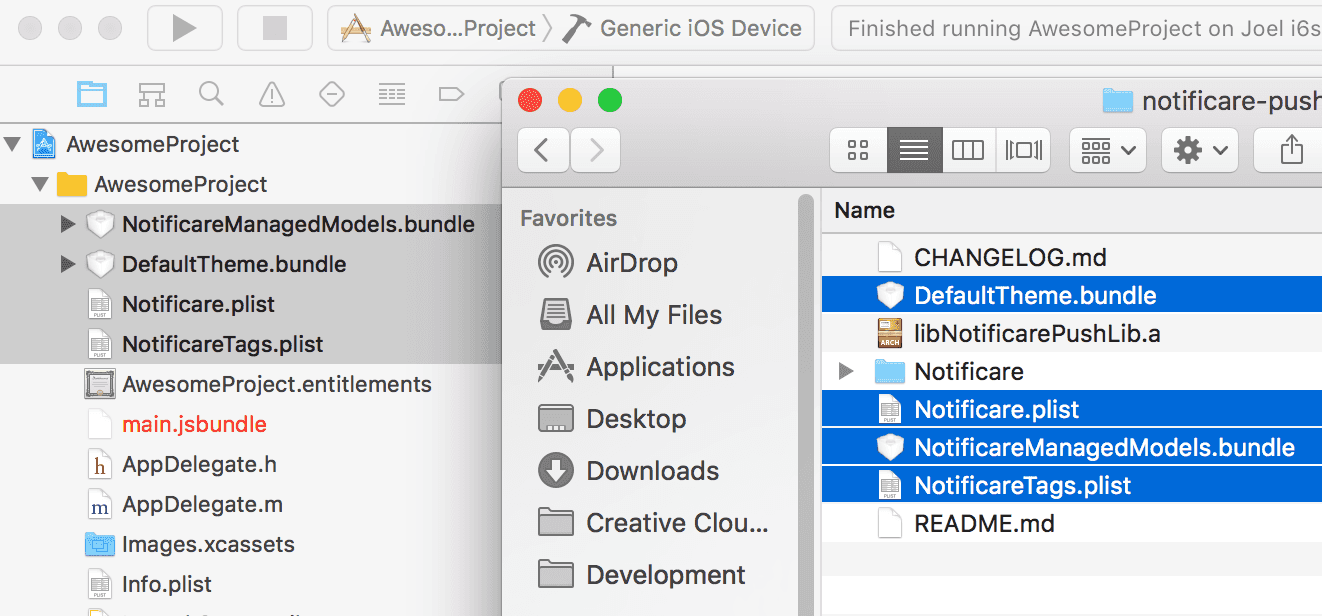
Then make sure you add the Application Key and Application Secret (for both development and production) in the Notificare.plist file:

Now let’s add the frameworks needed. Open your project in Xcode and select your app's target, then click the Build Phases tab:
Then go ahead and select your app's target and open the Build Phases tab:
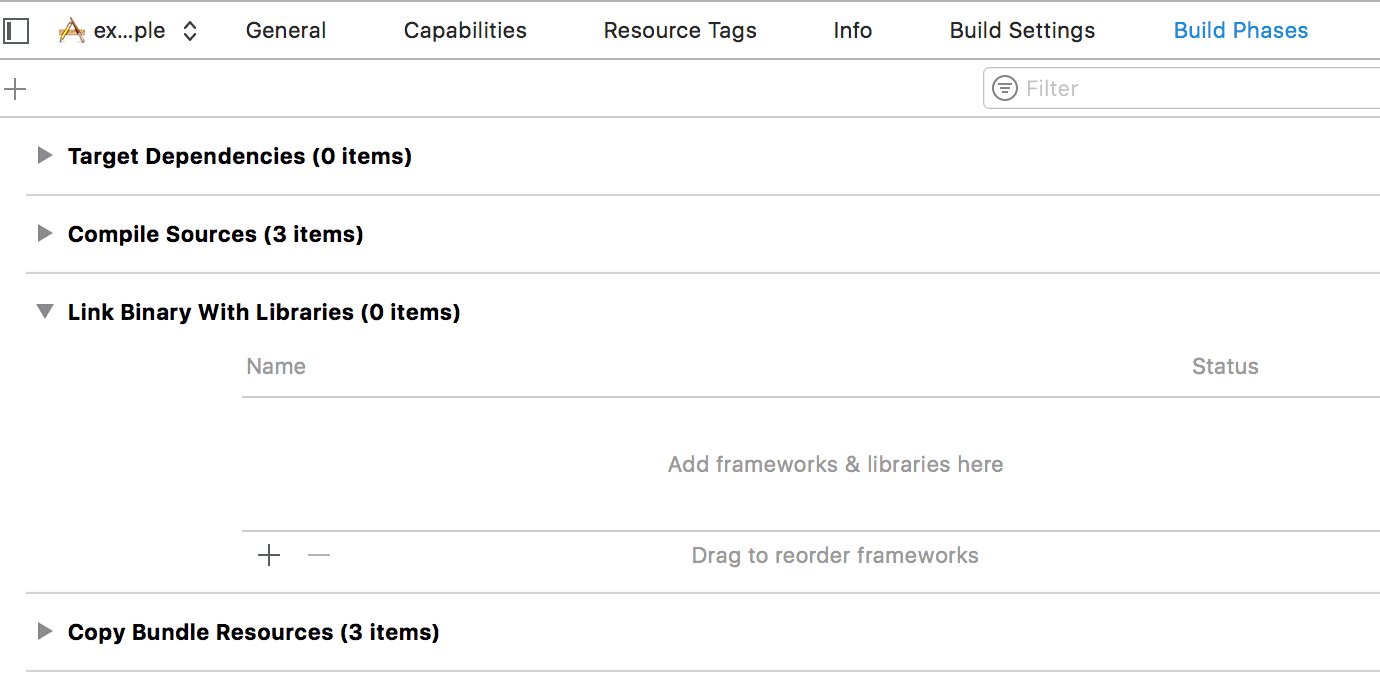
Expand the Link Binary with Libraries section and click in the plus button to start adding the necessary frameworks:
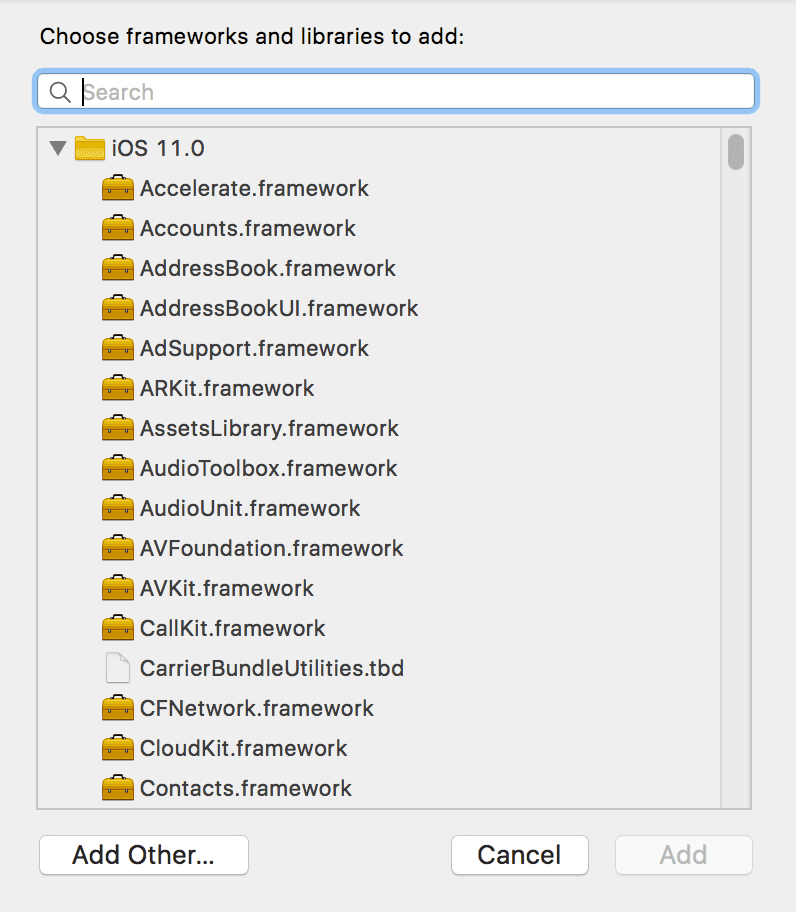
One by one add the following frameworks to your project:
- CoreLocation.framework
- CoreData.framework
- UserNotifications.framework (marked as optional)
- MobileCoreServices.framework
- MessageUI.framework
- libicucore.tbd
- UIKit.framework
- Foundation.framework
- CoreGraphics.framework
- PassKit.framework (marked as optional)
- MapKit.framework
- SystemConfiguration.framework
- Security.framework
- CFNetwork.framework
- ImageIO.framework
- StoreKit.framework
- SafariServices.framework
After you've added all these frameworks your Link Binary with Libraries will look like this:
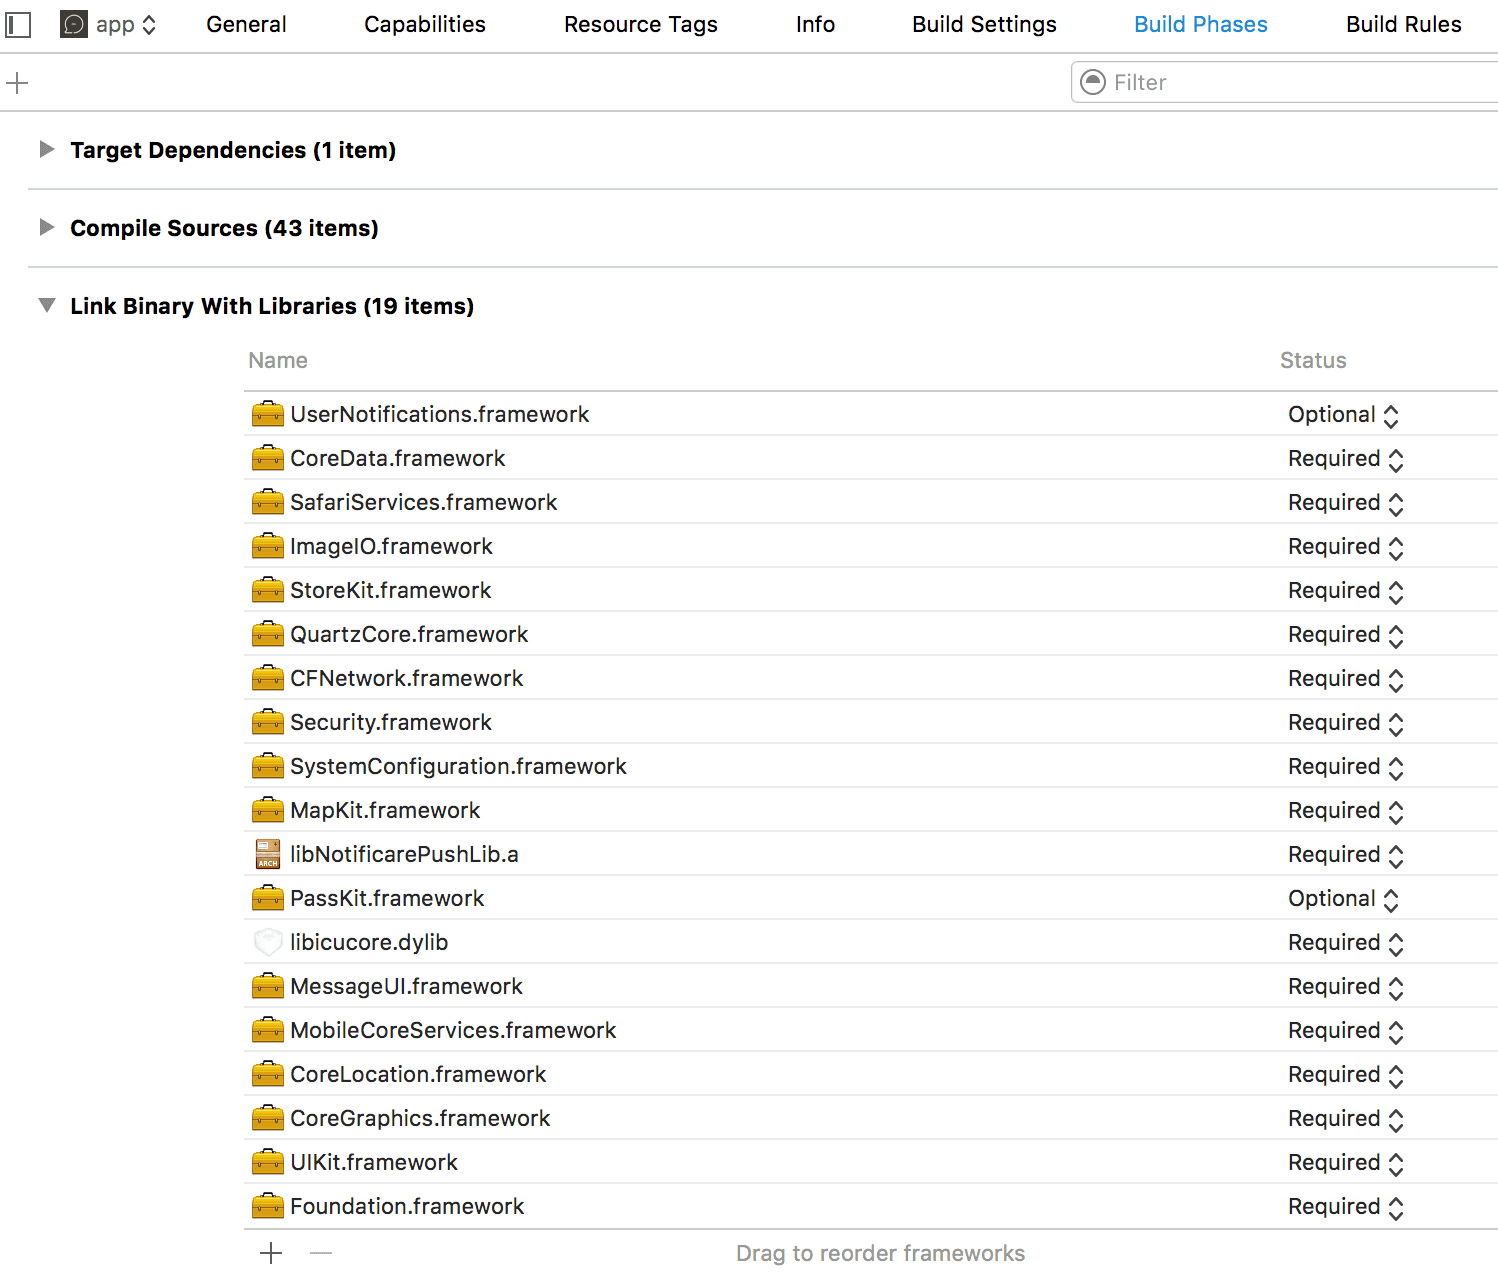
Finally, in your app's target, select the Build Settings tab and search for Other Linker Flags. In that property add -ObjC, like shown below::

Entitlements
Before you can start implementing our library code, you will need to add all the capabilities to your project. Go to your app's target and click in the tab Capabilities:

Obviously you will need to add Push Notifications by turning the following capability ON:

You should also turn the Remote Notifications background mode ON:

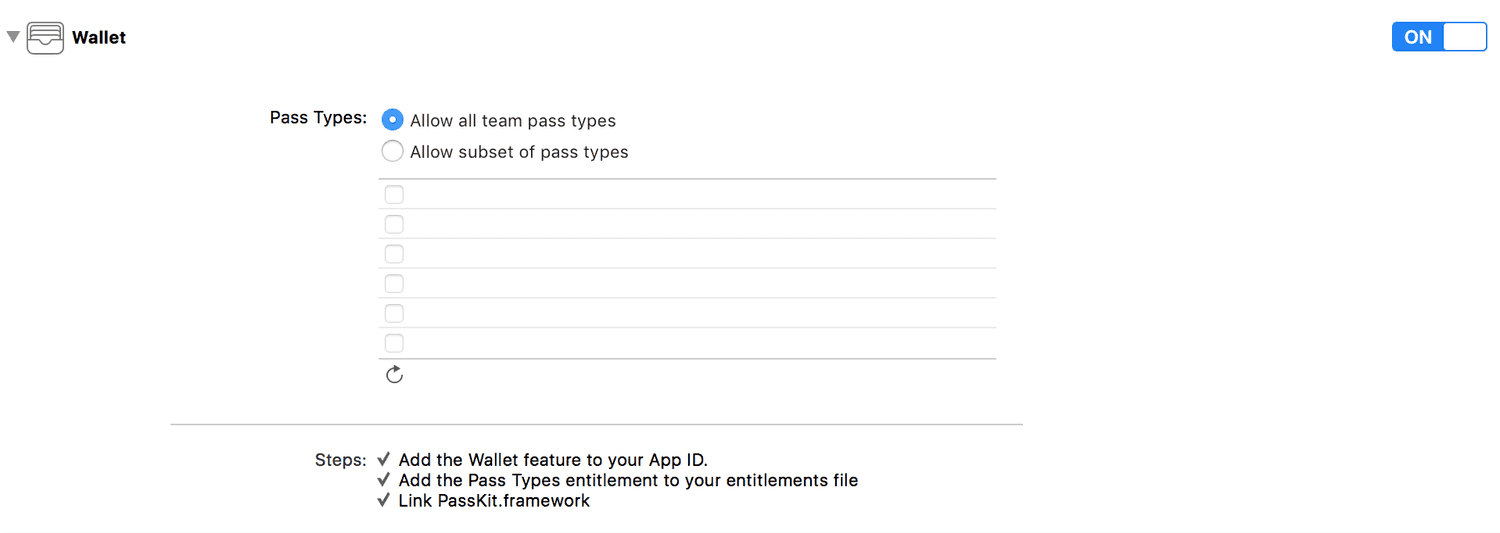
If you've subscribed to the Loyalty add-on and you will handle digital cards, then you should turn the Wallet capability ON:
Implementation
You are now ready to start implementing the native code necessary to make our module work. Open the file AppDelegate.m and import our module header file:
#import "NotificareReactNativeIOS.h"Then in the didFinishLaunchingWithOptions method include the following before any other code:
- (BOOL)application:(UIApplication *)application didFinishLaunchingWithOptions:(NSDictionary *)launchOptions
{

    ...more code

    [NotificareReactNativeIOS launch:launchOptions];

    ...more code

}
To make sure we can handle notifications you will need the following methods to the AppDelegate.m file:
- (BOOL)application:(UIApplication *)application openURL:(nonnull NSURL *)url options:(nonnull NSDictionary<UIApplicationOpenURLOptionsKey,id> *)options{

  [NotificareReactNativeIOS  handleOpenURL:url];

  return YES;
}

- (BOOL)application:(UIApplication *)application openURL:(nonnull NSURL *)url sourceApplication:(nullable NSString *)sourceApplication annotation:(nonnull id)annotation{

    [NotificareReactNativeIOS  handleOpenURL:url];

    return YES;
}

- (void)application:(UIApplication *)application didRegisterForRemoteNotificationsWithDeviceToken:(NSData *)deviceToken {

    [NotificareReactNativeIOS registerDevice:deviceToken completionHandler:^(NSDictionary * _Nonnull info) {
      //
    } errorHandler:^(NSError * _Nonnull error) {
      //
    }];
}


- (void)application:(UIApplication *)application didFailToRegisterForRemoteNotificationsWithError:(NSError *)error
{
    NSLog(@"didFailToRegisterForRemoteNotificationsWithError %@", error);
}

- (void)application:(UIApplication *)application didReceiveRemoteNotification:(NSDictionary *)userInfo fetchCompletionHandler:(void (^)(UIBackgroundFetchResult))completionHandler{

    [NotificareReactNativeIOS handleNotification:userInfo forApplication:application completionHandler:^(NSDictionary * _Nonnull info) {
        completionHandler(UIBackgroundFetchResultNewData);
    } errorHandler:^(NSError * _Nonnull error) {
        completionHandler(UIBackgroundFetchResultNoData);
    }];

}

/*
 * iOS 9 and below requires this delegate to handle lock screen actions
 */
- (void)application:(UIApplication *)application handleActionWithIdentifier:(nullable NSString *)identifier forRemoteNotification:(nonnull NSDictionary *)userInfo withResponseInfo:(nonnull NSDictionary *)responseInfo completionHandler:(nonnull void (^)())completionHandler {


    [NotificareReactNativeIOS handleAction:identifier forNotification:userInfo withData:responseInfo completionHandler:^(NSDictionary *info) {
        completionHandler(info);
    } errorHandler:^(NSError *error) {
        completionHandler(error);
    }];

}
You are now ready to start implementing functionality in javascript. Open your index.ios.js file and import the following modules:
import {
    ... more Libraries
    NativeModules,
    NativeEventEmitter
} from 'react-native';
Then let’s reference the Notificare Module so you can use it inside your React components:
const Notificare = NativeModules.NotificareReactNativeIOS;You can now start using Notificare in your component, for that you will to listen to events. The best way to initialize the event emitter class is to add it to the constructor of your component, like this:
export default class AwesomeProject extends Component {

  constructor(props){
    super(props);
    this.eventEmitter = new NativeEventEmitter(Notificare);

  }

... more code

}
Now the best way to initialize Notificare is to add the following to the componentWillMount method in your component:
export default class AwesomeProject extends Component {

    ...more code

    componentWillMount() {

        Notificare.launch();

        this.eventEmitter.addListener('ready', (data) => {

        });

        ...more code

    }

...more code

}
At this point, you have completed the basic setup of our library. Keep reading our implementation guides to dive deeper into each features available in our SDK.