Configure App
In this area you will find and edit all the basic information about your app. Only accounts with a proper access role will be able to configure an app.
Under the Settings menu, you should click in Configure App to access this area:

In this area, you will find the app's identifier:

This might be requested from you by our team whenever you use our support channel.
You can also upload an app's icon in this area:
![]()
And you can also change the app's name:

Both these fields will be used by our interface to help you identify your app. Additionally, the app's name might also be used in web push notifications, when no title is provided.
You should also always define the app's category:

The value in this field helps us determine industry benchmarks for apps running in our platform. All these fields will be used by our interface to help you identify your app. Additionally, the app's name might also be used in web push notifications, when no title is provided.
You will also find a global setting, that will prevent our platform from sending too many messages. When provided, this will define the maximum amount of messages sent during a certain period of time to a single push device, email contact or phone number:

This limit can also be overridden at the message level, allowing you to bypass this limitation, and still send really important messages.
Stores
In this section, you should provide us the App Store ID and Package Name of your apps (if applicable).

When provided, they will enable certain types of push notifications, like the Rate App.
Users
In this section, you should define how we handle user registration, lifetime and a sensible fallback for the username.

By default, your apps will be allowed to register devices with a userID/userName combination right from the device itself. In this field, you can change the user registration type:

The other possible value will be API Level. When enabled, your app will no longer be able to register an alias to a device, and instead you need to do this from your own servers using our REST API. This will make sure that you can synchronize user registration in Notificare with a proper authentication method provided by your server-side application.
In this section you can also define the user lifetime:

By default, this option will be defined as Forever. Which means we will never deactivate your users independently of their last active date. You can select between Forever, One Month, Three Months, Six Months, One Year, Two Years or Three Years. Depending on the metrics your business cares about, you can choose to deactivate users when their last active date is older than one of these options. This will only apply to push devices. If a user contains email contacts or phone numbers, it will not be affected by this setting.
Finally, you can also define a default value for the userName placeholder:

We will honor this value whenever you use the {{userName}} placeholder in your messages but the user is anonymous.
Privacy Settings
In this section, you can define privacy settings that we will use throughout our dashboard to configure certain areas, sections or features of our platform.

Currently, the only option available is the ability to hide user's location in certain areas of our dashboard. This is done by toggling the following option OFF:

User Data Fields
In this page you can also configure User Data Fields.

These key-pair fields can be used by your apps to store additional data for each device. These will also be available as placeholders in your messages, helping you take message personalization a few steps further.
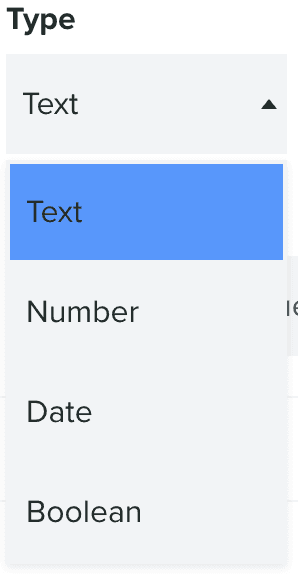
For each User Data Field you add, you will need to select a Type:

A Key, which should be machine-readable string:

A Label, which should be human-readable string:

And optionally, a Default Value, which should be human-readable string too:

We will use this value whenever you use this field as a placeholder ({{userData.KEY}}) in your messages, but there's no value associated with it.
You can add as many fields as you want by clicking in the button below:

And you can drag each field to a different position in the list by dragging the following icon:

You can also delete each field by clicking in the button in the top right corner.
Finally, when you want to store any changes to this page, you should hit the Save button:

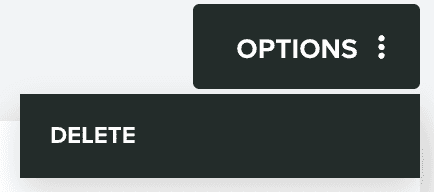
If you own the app, in this page, you can also delete the app. This is a destructive action and cannot be undone. Once you confirm you want to delete the app, you will not be able to recover it or any of its data. To delete the app click in Delete under the Options menu:

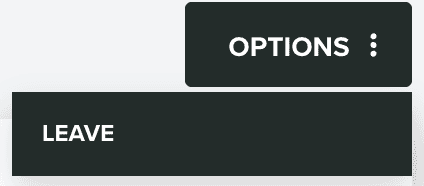
If you do not own the app, in this page, you can leave it. The app owner can still invite you again to this app at any time in the future. To leave the app click in Leave under the Options menu.
