Import Jobs
In this area you can create import jobs. Whenever you need to manually import data into your apps, this is the area where you need to go.
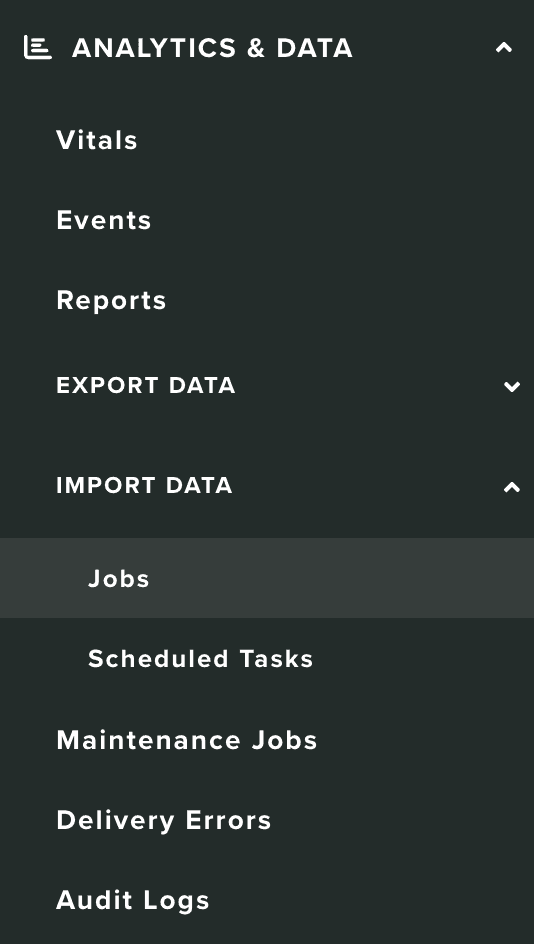
You start by expanding the Analytics & Data menu item, then the Import Data menu item and finally click in Jobs:

In this area you will find the list of import jobs you've created:

You can create a new import job by clicking in the following button:

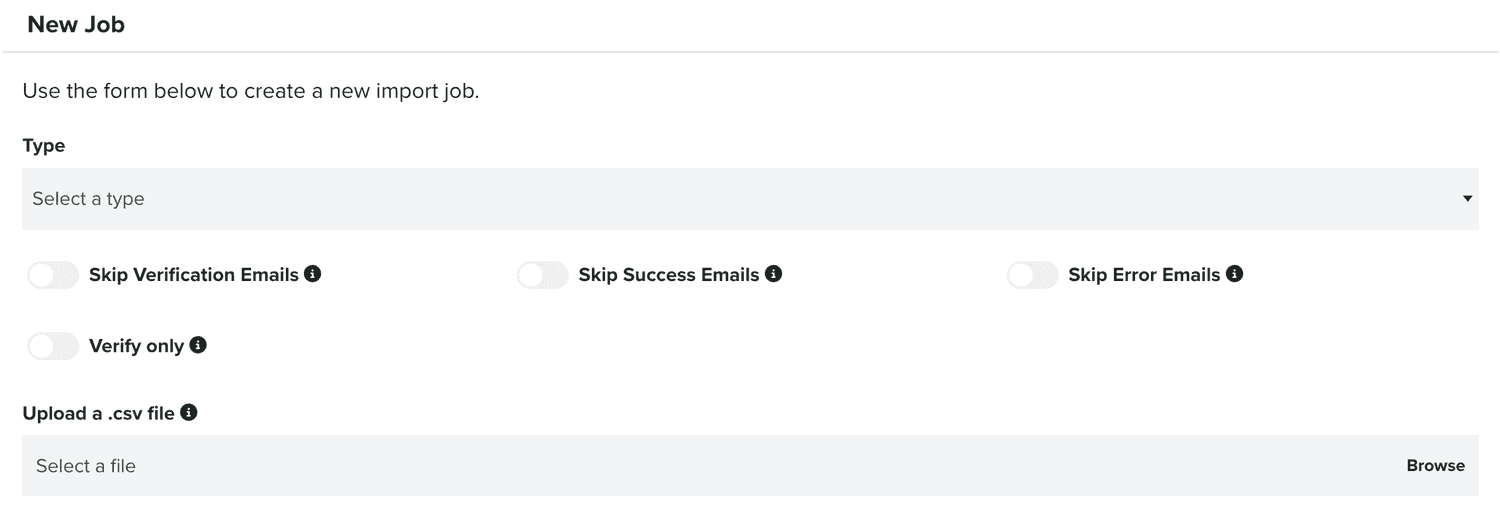
This will take you to the following page:

You will then need to select one of our export job types:

And define if your export job should generate system emails when it is verified and if it succeeds or fails. You can also define an import job to run only in verification mode, where we will only verify if your data is valid but not import it.
Import Devices/Contacts/Numbers
With this import job, you will be able to import push devices, email contacts and phone numbers.
You can also define if the data in your import file should overwrite any previously imported records:

This will not be applicable to push devices, email contacts and phone numbers created that were not imported.
If you do want to overwrite data for any record, included data not imported, you can define that by toggling ON the following option:

You should then select which medium you want to use:

You will need to separately import push devices, email contacts and phone numbers.
If you choose Push as your medium, you can also provide defaults values for the following properties:

And if you include tags in your import file, you should toggle this option ON:

Which will allow you to customize the character we will use as the separator between tags. If no separator is provided, we will use | (vertical line). Obviously, this must match what you include in your import file.
Example .csv file for Push devices
deviceID,osVersion,appVersion,platform,language,userID
"b489bc0c0c4420dc6b09f54270548292a102ac9","8.0","1.1","iOS","nl","test123@example.com"
"c0c4420dc6b09f54202ac83385f9f0a150dc6b0","8.1","1.1","iOS","en","test456@example.com"
"9f54270548292a102ac93b07e952aeb283385f9","7.1","1.0","iOS","pt","test789@example.com"
Example .csv file for Email devices
subscriptionId,language,userID
"joel+import-1@notifica.re","nl","test123@example.com"
"joel+import-2@notifica.re","nl","test124@example.com"
Example .csv file for SMS devices
subscriptionId,language,userID
"+31098765432","nl","test123@example.com"
"+31098765433","nl","test124@example.com"
Import Users
With this import job, you will be able to import user profiles.
Although you can import push devices, email contacts and phone numbers that include a userID/userName and create user profiles in one go, sometimes you just want to first start with user profiles and segments. This import job allows you to do just that. Please note that user profiles without any push devices, email contacts and phone numbers will not be visible in our dashboard.
Example .csv file
userID,userName
"test123@example.com","Test User 1"
"test123@example.com","Test User 2"
"test123@example.com","Test User 2"
Import Users into a Segment
With this import job, you will be able to assign users to segments. Assuming you've already imported users or created them via our SDK or API, you can then provide us an import file that we can use to assign them to a segment.
You will then need to search and select one segment (you can also create one if it doesn't exist):

You can also define if we should remove all users from a segment, before importing new data:

It is also possible to send a message to all users in the segment you've selected after the import is completed:

If you toggle this option ON, you will then need to select a previously created message template:

The message template will define what medium and content we will use to send the message.
By default, we will send the message right after the import is completed, but you can also define if it should be scheduled for a date in the future:

If you toggle that option ON, you will then need to provide the following information:

Example .csv file
userID
"user1@email.com"
"user2@email.com"
"user3@email.com"
Import Devices into a Tag
With this import job, you will be able to assign devices to tags. Assuming you've already imported devices or created them via our SDK or API, you can then provide us an import file that we can use to assign them to a tag.
You will simply need to search and select one tag (you can also create one if it doesn't exist):

Example .csv file
Below you find the .csv file example for this type of import for subscription identifiers (using push token, email address and/or SMS number):
subscriptionId
"user1@email.com"
"+31987654321"
"b489bc0c0c4420dc6b09f54270548292a102ac9"
Import User Data
With this import job, you will be able to import user data. This import job only makes sense if you've first defined User Data Fields as described here.
For this import job, you only need to define, if we should ignore any empty values you might provide in the import file:

If this options is not defined, and you include empty values for certain fields, we will assign an empty value to those fields.
Example .csv file
userID,firstName,lastName
"test123@example.com","John","Doe"
"test123@example.com","Jane","Doe"
"test123@example.com","George","Doe"
Import Regions
With this import job, you will be able to import Geo-Zones, POIs, cities and countries.
If you want to update an existing region, you should toggle this option ON:

Example .csv file
name,category,major,latitude,longitude,distance,timezone
"Amsterdam Shop","fence","12345","52.357079","4.929666","1000","Europe/Amsterdam"
"New York Shop","fence","12346","40.7058316","-74.2581936","1000","America/New_York"
"Tokyo Shop","poi","12347","35.6742958","139.574921","1000","Asia/Tokyo"
Import Beacons
With this import job, you will be able to import beacons inside Geo-Zones.
If you want to update an existing beacon, you should toggle this option ON:
![]()
If you want to automatically create a Geo-Zone when the data provided includes non-existing ones, you should toggle this option ON:

If you toggle this option ON, you can then also provide default values for those new Geo-Zones:

You can ignore these, if you include them in the import file.
Example .csv file
name,major,minor,latitude,longitude,timezone
"Entrance","12345","1001","52.357079","4.929667","Europe/Amsterdam"
"POS","12345","1002","52.357078","4.929668","Europe/Amsterdam"
"Milk Aisle","12345","1003","52.357077","4.929669","Europe/Amsterdam"
Import Loyalty Program's Unique Codes
With this import job, you will be able to import unique codes for a loyalty program of type One-Time-Offer.
For this type you only need to select which program you want to import unique code into:

Example .csv file
code
"123456789"
"123456780"
"123456781"
Batch Passes Import
With this import job, you will be able to create digital passes or update existing ones.
You should then select what pass template you want to use:

If you are importing existing passes that were generated using our Loyalty v1 add-on, you can use the following option to automatically make them compatible with the new version:

Please note that this option is only available, if you are using the Loyalty v2 add-on.
When you select a pass template, you will also be able to provide default values for fields in the pass:

As well as add or overwrite locations in the passes:

And beacons in the passes:
![]()
You can also send a message when new passes are created:

Or updated:

If you toggle any of these options ON, you will then also need to provide a message template:

Additionally, you can also define if we should ignore the notification_ prefix:

If this option is ON, you don't need to include that prefix in your message template's placeholders.
Please note that you have several placeholders that you can use in your message template to point users to the actual passes being generated by this import. The following placeholders are available:
For Loyalty v1:
- {{pass_link|escape}} (Link for iOS devices that support Wallet passes)
- {{pass_link_view|escape}} (Link to the web version of a pass)
- {{pass_link_app|escape}} (Universal link for iOS, Android and Web)
For Loyalty v2:
- {{pass_link_apple|escape}} (Link to Apple Wallet passes)
- {{pass_link_google|escape}} (Link to Google Wallet passes)
Example .csv file
Recognized columns:
- userID
- message
- pass_barcode (unique)
- pass_barcode_message (non-unique, only one of these can be used)
- pass_barcode_alt_text
- pass_barcode_show_alt_text
- pass_relevant_date
- pass_expiration_date
- pass_location_latitude
- pass_location_longitude
- pass_location_altitude
- pass_location_relevant_text
- pass_location_region_major
- pass_location_region_id
- pass_locations (list of max 10 locations, separated by '|' and formatted as 'latitude;longitude;altitude;relevantText')
- pass_beacons (list of max 10 beacons, separated by '|' and formatted as 'proximityUUID;major;minor;relevantText')
- pass_xxx (where xxx is any field defined in the Passbook Template)
- notification_xxx (where xxx is any arbitrary type of data you wish to include in your message)
Example with a single location referenced by a Geo-Zone identifier:
userID,pass_barcode,pass_boarding,pass_origin,pass_destination,pass_flight,pass_gate,pass_seat,pass_location_region_major,pass_relevant_date,pass_expiration_date,notification_username
joris@notifica.re,12345,930P,AMS,MSY,KL1234,D2,42A,2,2017-08-29T21:00:00,2017-08-30T00:00:00,Joel
joel@notifica.re,12346,930P,AMS,MSY,KL1234,D2,42A,2,2017-08-29T21:00:00,2017-08-30T00:00:00,Joris
Example with a list of locations:
userID,pass_barcode,pass_boarding,pass_origin,pass_destination,pass_flight,pass_gate,pass_seat,pass_locations,pass_relevant_date,pass_expiration_date,notification_username
joris@notifica.re,12345,930P,AMS,MSY,KL1234,D2,42A,"52.3105;4.7683;;You are here|29.9911;-90.2592;;You are there",2017-08-29T21:00:00,2017-08-30T00:00:00,Joel
joel@notifica.re,12346,930P,AMS,MSY,KL1234,D2,42A,"52.3105;4.7683;;You are here|29.9911;-90.2592;;You are there",2017-08-29T21:00:00,2017-08-30T00:00:00,Joris
Batch Update Pass Fields Import
With this import job, you will be able to update fields in existing digital passes.
You should then select what pass template you want to use:

When you select a pass template, you will also be able to add or overwrite locations in the passes:

And beacons in the passes:
![]()
Example .csv file
Recognized columns:
- pass_barcode (unique)
- pass_barcode_message (non-unique, only one of these can be used)
- pass_barcode_alt_text
- pass_barcode_show_alt_text
- pass_relevant_date
- pass_expiration_date
- pass_location_latitude
- pass_location_longitude
- pass_location_altitude
- pass_location_relevant_text
- pass_location_region_major
- pass_location_region_id
- pass_locations (list of max 10 locations, separated by '|' and formatted as 'latitude;longitude;altitude;relevantText')
- pass_beacons (list of max 10 beacons, separated by '|' and formatted as 'proximityUUID;major;minor;relevantText')
- pass_xxx (where xxx is any field defined in the Passbook Template)
pass_barcode,pass_gate
12345,D2
12346,D2
Batch Private Messages Import
With this import job, you will be able to send private messages to users, push devices, email contacts or phone numbers. This import job is ideal when you want to include dynamic data in your message that is not stored in Notificare.
You will then need to select a template:

Additionally, you can also define if we should ignore the notification_ prefix:

If this option is ON, you don't need to include that prefix in your message template's placeholders.
By default, we will send the message right after the import is completed, but you can also define if it should be scheduled for a date in the future:

If you toggle that option ON, you will then need to provide the following information:

Finally, you can also filter users, push devices, email contacts or phone numbers included in your import file by segmentation, location, device properties or user data:

To learn more about criteria, please read the guides located here.
Example .csv file
Recognized columns:
- userID
- deviceID
- title
- subtitle
- subject
- message
- replyTo
- senderName
- senderAddress
- group
- badge
- channel
- targetContentIdentifier
- listHeader
- interruptionLevel
- filterCriteria
- sound
- push
- inbox
- requireInteraction
- renotify
- linkTracking
- overrideSendingLimit
- useListHeaders
- presentation
- critical
- enableRiskCheck
- ttl
- inboxTtl
- rate
- relevanceScore
- criticalSoundVolume
- notification_xxx
Below you find the .csv file example for this type of import for users:
userID,message,notification_placeholder1,notification_placeholder2
joris@notifica.re,"Great stuff {{notification_placeholder1}}. You have now {{notification_placeholder2}} points",Joris, 50
joel@notifica.re,"Great stuff {{notification_placeholder1}}. You have now {{notification_placeholder2}} points", Joel, 150
Below you find the .csv file example for this type of import for devices:
deviceID,message,notification_placeholder1,notification_placeholder2
ede4451c18dfa4bc08de6296c472558f17a3f2a38e1593a0c5cd1e8ea6f25171,"Great stuff {{notification_placeholder1}}. You have now {{notification_placeholder2}} points", Joris, 50
ede4451c18dfa4bc08de6296c472558f17a3f2a38e1593a0c5cd1e8ea6f25172,"Great stuff {{notification_placeholder1}}. You have now {{notification_placeholder2}} points", Joel, 150
Below you find the .csv file example for this type of import for subscription identifiers (using push token, email address or SMS number):
subscriptionId,message,notification_placeholder1,notification_placeholder2
joris@notifica.re,"Great stuff {{notification_placeholder1}}. You have now {{notification_placeholder2}} points", Joris, 50
joel@notifica.re,"Great stuff {{notification_placeholder1}}. You have now {{notification_placeholder2}} points", Joel, 150
Columns in the CSV will overwrite corresponding values in the Notification Template, both CSV provided placeholders (e.g., {{notification_placeholder}}) and standard placeholders (e.g., {{userName}}) can be used, both in the template and inside CSV values.
Batch Grouped Messages Import
With this import job, you will be able to send one single message to multiple users, push devices, email contacts or phone numbers. This import job is ideal when you want to include dynamic data in your message that is not stored in Notificare.
You will then need to select a template:

When you select a template, you will also be able to override values for certain properties. This might be useful if you want your message to behave differently without having to change the template. You simply need to add fields in the following section:

You will only be able to select, add and provide values for fields that exist on the type of template you've selected:

Additionally, you can also define if we should ignore the notification_ prefix:

If this option is ON, you don't need to include that prefix in your message template's placeholders.
By default, we will send the message right after the import is completed, but you can also define if it should be scheduled for a date in the future:

If you toggle that option ON, you will then need to provide the following information:

Finally, you can also filter users, push devices, email contacts or phone numbers included in your import file by segmentation, location, device properties or user data:

To learn more about criteria, please read the guides located here.
Example .csv file
Recognized columns:
- userID (unique)
- deviceID (unique, this property is ignored if a userID is included)
- subscription (unique, this property is ignored if a userID or deviceID is included)
- notification_xxx
Below you find the .csv file example for this type of import for users:
userID,notification_placeholder1,notification_placeholder2
joris@notifica.re, Joris, 50
joel@notifica.re, Joel, 150
Below you find the .csv file example for this type of import for devices:
deviceID,notification_placeholder1,notification_placeholder2
ede4451c18dfa4bc08de6296c472558f17a3f2a38e1593a0c5cd1e8ea6f25171, Joris, 50
ede4451c18dfa4bc08de6296c472558f17a3f2a38e1593a0c5cd1e8ea6f25172, Joel, 150
Below you find the .csv file example for this type of import for subscription identifiers (using push token, email address or SMS number):
subscriptionId,notification_placeholder1,notification_placeholder2
joris@notifica.re, Joris, 50
joel@notifica.re, Joel, 150
Finally, you will need to upload a CSV file:

You need to make sure that you format the data in these files as described in each of these type's examples.
Once you've created an import job, it will be put in a queue and ran as soon as possible. You can see their state on each entry in the list:

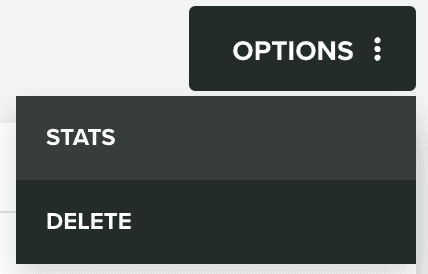
Once it is finished, you can click on that entry to see its results. If your export is of type Batch Private Messages Import or Batch Grouped Messages Import, you can see performance metrics for those messages, by expanding the Options menu and click in Download:

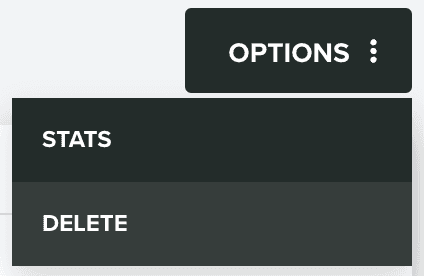
You can also delete an import job, by expanding the Options menu and click in Delete:
