Create Passes
In this page you'll learn how to create a pass. Passes are generated based on a previously created pass template. If you did not create one yet, please read the guides located here.
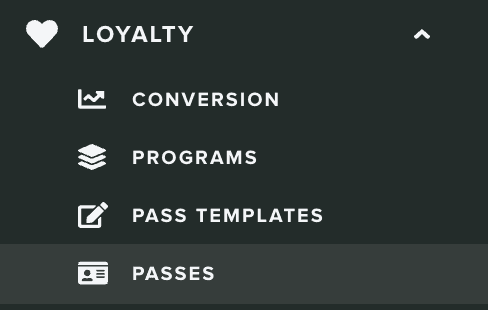
To access this page, expand the menu item Loyalty and click in Passes:

To create a pass, click in the New Pass button from the list of passes:

In that page you'll find the pass wizard, which is divided in four different tabs like the ones shown below:

Setup
In this tab you will need to select which template you'll use:

Depending on the template you use, other tabs will require different input. You start by searching for an existing template:

Once you've found the template you want to use, click on it to select it:

Relevance
In this tab you can optionally provide a list of of locations and/or beacons (iOS only) where your passes should become relevant. Both platforms will take this into consideration and show it in the device's lockscreen, when applicable.
You can add up to 10 locations. These can be addresses or geo-zones, POIs, cities or countries you previously created in Locations (if your plan support Location Services).

To add location select the type of location you want and type in the search field:

If the desired location is found you can simply click on it to add an entry in the locations list:

Additionally for each location you add, you can also define a relevant text (iOS only) which will replace the generic system message used in the lockscreen and an altitude (in case your location location above ground, e.g. in a skyscraper).
You can then also do the same for beacons (iOS only) and add up to 10 beacons:
![]()
Clicking in Add a beacon will add an entry as follows:
![]()
Only Proximity UUID is mandatory and will be pre-filled with whatever UUID you already defined for your application (if any). Additionally, if you want to target specific beacons, you should then provide the Major and Minor identifiers. Finally, for each beacon you add, you can also define a relevant text, which will replace the generic system message used in the lockscreen.
Fields
In this area, you will need to define the values for all the Pass Fields you've created in your template. These will be unique for each pass and if left blank they will simply use the default values you've defined.

Barcode
Use this area if you wish to include a custom barcode value. By default we will generate a unique identifier for you but if you wish to include a value that your scanning infrastructure understands, you can provide one in the field below:

And once you are ready to create your pass, click in the Create Pass button:

To access this page, expand the menu item Loyalty and click in Passes:

To create a pass, click in the New Pass button from the list of passes:

In that page you'll find the pass wizard, which is divided in six different tabs like the ones shown below:

Setup
In this tab you will need to select which template you'll use, depending on the template you use other tabs require different input. You start by searching for an existing template:

Once you've found the template you want to use, click on it and it will look like this:

Soon you select a template you will be able to change the Organization Name assigned to it (if any):

You will also be able to change the Description initially assigned by your template:

Redeem
In this tab you will be determining how your pass can be redeemed or when it will expire. Start by selecting between in the Redeem Options selector:

If you select Redeem Pass N Times you will need to also provide the number of times the pass can be redeemed:

Optionally, you can also provide a date where the pass will automatically expire, independently of the redeem options:

Relevance
In this tab you can optionally provide information that will be trigger the pass to be shown in the lock screen based on location or time. If you wish to prompt the pass in the lock screen when user is near one or more locations (up to 10), you search for any address or any of the geo-zones, POI's, cities or countries you've created in the field below:

Simply search for any of the options available like shown below:

As you click in the locations you want to add, they will be displayed like the following:

For each location you add, you can also define which text should show in the lock-screen whenever a user is in the vicinity. This is done by inserting a value in the following field:

If you add locations, you can also specify a maximum distance within which those locations will be relevant. By default we will use 500 meters as we consider this a reasonable value but you can choose to change that value:

Additionally if have BTLE beacons, you can also use them as a relevant lock-screen trigger for your passes. Toggle in the option below to include beacons (up to 10):
![]()
Then to add beacons, click in the Add a beacon? link from the following section:
![]()
By default we will add an entry using only the Proximity UUID for your app, like shown below:
![]()
If you want, you can also add a Major and Minor to achieve fine-grained precision for these lock-screen messages. For each beacon, pretty much like locations, you can also provide the text that will be shown in the lock-screen:

Please note that only passes added to the user wallet, will be prompted in the lock screen based on this data.
Design
In this tab you will be able to change the look and feel of your pass. These settings are already configured by the template you use but you will be able to change for each individual pass. The artwork used by your pass will depend on the type of pass:

Finally, you can also change the colours used by your pass:

Fields
Optionally the template you choose might contain fields. Depending on the fields added to the template, you'll see different field types. It is mandatory that all fields have values. If a field is of type String you'll have to fill a text in a field the one below:

If the field is of type Date, you'll see a date picker like the one below:

And if the field is of type Number you'll see a number input field like the one below:

And if the field is of type Number with a currency, you'll see an input field like the one below:

Optionally if you wish to add a machine-readable object that a companion app can access (this data will not be visible for the user) you can include a JSON object in the following field:

This data can be used to include information that an app can make sense of. For example in a member card this object could contain the preferences of the user to help staff know what a customer usually likes.
Barcode
Click in the Barcode tab if you wish to include a custom barcode value. By default we will generate a serial number for you but if you wish to include a value that your scanning infrastructure understands, you can provide one in the field below:

And once you are ready to create your pass, click in the Create Pass button:

Keep reading our guides to learn how to edit a pass.