Users & Authentication
The Users & Authentication add-on offers a complete set of features to help you quickly create rich user profiles, user generated segmentation and restricted authenticated areas in your apps. Easily create a login and sign up views in your app, add a password management and recovering mechanism or simply allow your authenticated users to build rich profiles. This is an add-on feature of Notificare. Before you can subscribe to this add-on you will need to be enrolled in a paid plan.
To access these pages, expand the Settings menu and click in Services like shown below:

Then you should click the Subscribe button in the Users & Authentication box:

The very first field in this page will be a read-only one, you can use it to copy the URL Scheme required when configuring our SDK in iOS and Android:

By default User Registration mode will be set to Device Level, this means that any user registration from your mobile apps will be accepted without any form of authentication. If you subscribe to this add-on you will need to change it to Device Level (using OAuth2 only) option in order to only allow you app to register a user profile if a user is authenticated. Go ahead and change that option as shown below:

There's also a 3rd option, API Level. If set, we will not allow user registration from the mobile apps at all. Instead our platform will only accept device registrations, that include a userID and userName, from requests using the Master Secret which should only be done from your back-end applications.
Once you tackled the user registration mode, you will want to define if you want to always validate an email address after a sign up, if you do, check the following box:

And if you don't want users to be able to sign in before validating their email, check the following box:

Even if you don't use the options mentioned above, this feature will generate email messages (e.g. users signs up or requests a lost password recovery) and by default those messages will be sent by our own domain (notifica.re) and will have our look and feel. You will want to change this by allowing us to send emails on your behalf and by customizing the email messages. To do that you need to provide the domain you want to use in the field below:

After changing these options, go ahead and click the Save button to store these changes:

If you've provided a Sender Domain, your domain is now pending validation and you will be see a new option Show instructions for DNS setup. Clicking on this option will reveal a table containing the DNS records you must add to your domain in order for us to send email in your behalf:

Depending how your DNS records are setup and how fast it propagates, our platform will keep checking for these records and once it resolves, we will display your domain as follows:

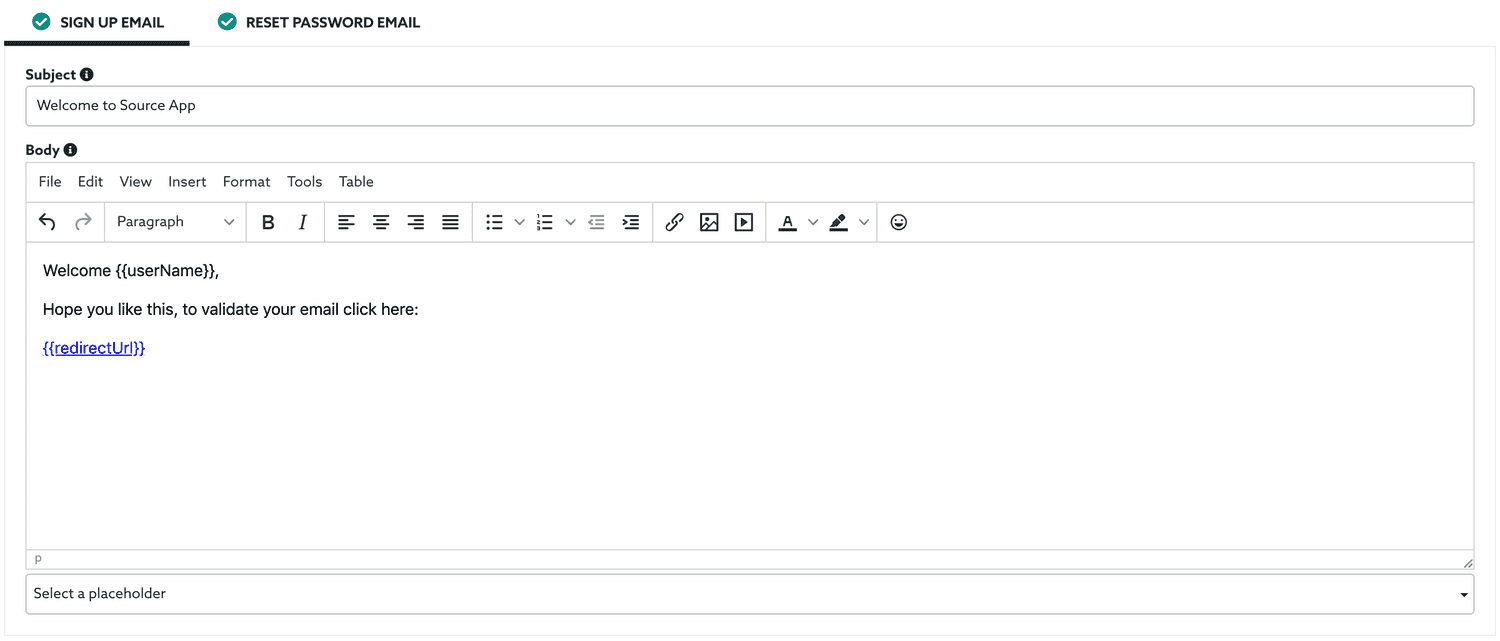
Once your domain has been verified, we are now able to send emails under your behalf. This will also make email messages section visible, where you can customize the messages we will send. There's tow type of emails we will send, using the tabs below, you will be able to customize how these messages should look like. Start by customizing the Sign Up Email message:

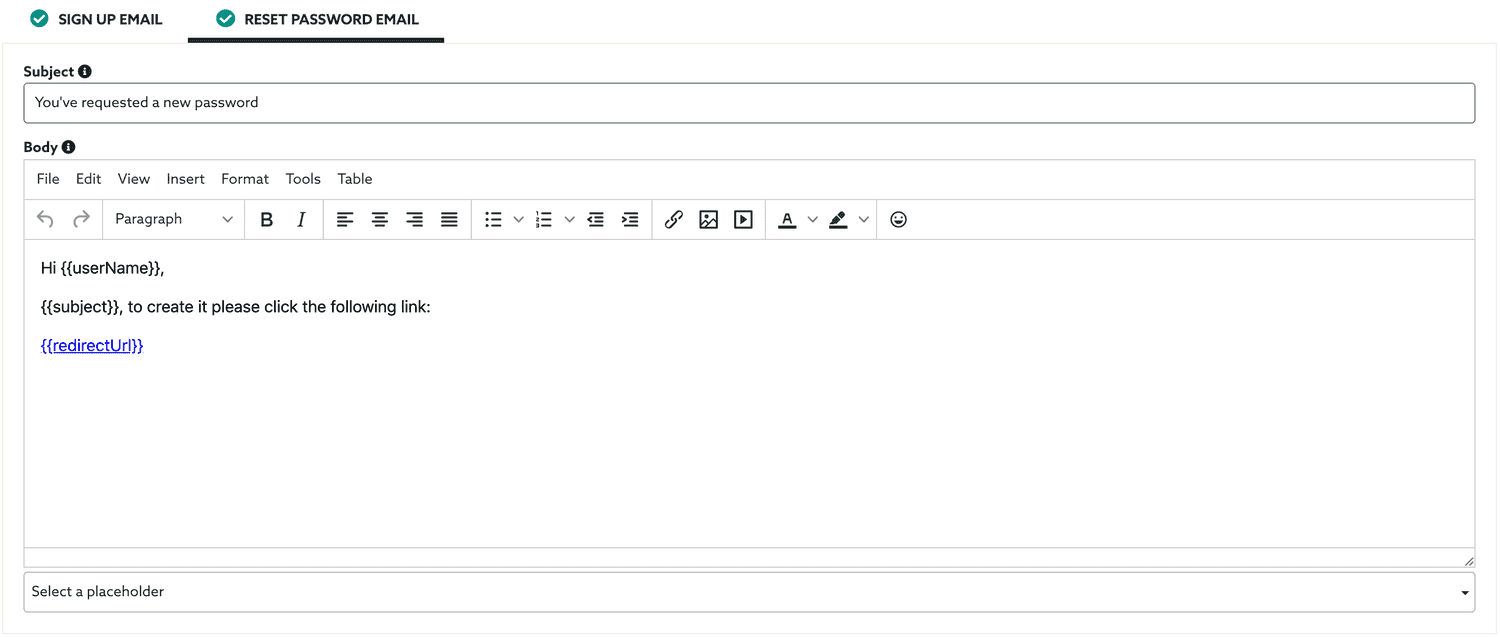
Then you can also customize the Reset Password Email that will be sent when in response to a password recovery request:

One important bit of information: you need to always include the {{redirectUrl}} placeholder. You can find all the placeholders available in the Select placeholder option.
After changing the content of these emails, don't forget to click the Save button to save the changes:

If this service is active, there will be one new option in your app's menu called User Preferences under the menu item Audience. To learn more about it, please read the guides located here.