SMS
In this area you can set up your SMS Service. With this service you are able to manage the lease of a mobile phone number and sending SMS messages to mobile phones. In this area you will be able to acquire a phone number, setting up a Sender Name as well as configure pre-defined localized messages for new opt-ins and opt-outs. Please note that to use this service you will need to buy Email credits before you can start sending messages.
To access these pages, expand the Settings menu and click in Services like shown below:

Then you should click the Configure button in the SMS box:
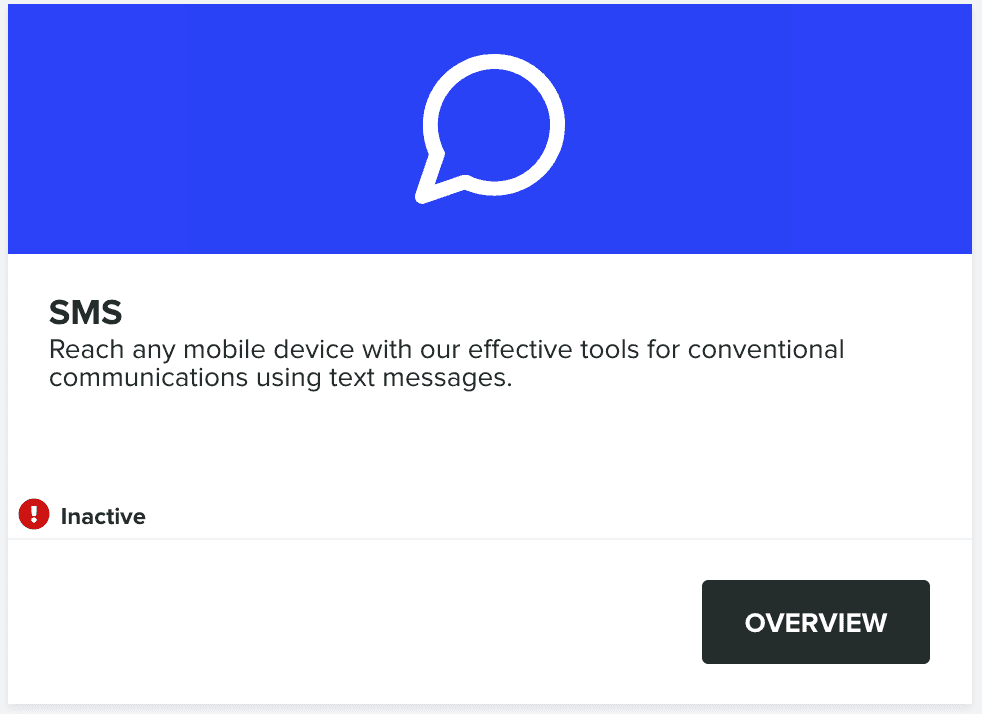
The very first time you visit this page, your service will not be yet active, to start that activation please click in the Activate button in the following section:

This will create the underlying SMS account required for this service to work. Once completed you can start by adding one or more phone numbers to your service. These will be the numbers used by us to send your messages (also known as Long Code Messaging). Because these numbers have a monthly cost, you need to enroll in a paid plan before requesting them.
Adding more than one number might be interesting if you are looking to send high volumes of messages (although not recommended in US & Canada). Each phone number is bound to a limit of 10 messages per second in all countries, except when sending to US & Canada where that limit is 1 per second. Furthermore, a new A2P 10DLC system introduced by US carriers in 2021 will soon make these obsolete by enforcing MPS limits at a message level, rather than at the level of individual phone numbers.
To achieve higher throughput, in some countries, you can also request our team a Short Code. These are a 5 or 6-digit numbers that can send and receive SMS to and from mobile phones. Currently, we support Short Codes in the following countries: Argentina, Brazil, Canada, Colombia, Dominican Republic, France, Germany, India, Mexico, Spain, Sweden, New Zealand, United Kingdom and USA. With a Short Code you can send up to 100 messages per second. Higher send rates can be requested for an additional fee.
However, Short Codes are much more expensive than Long Codes, and Notificare only leases them on a 1-year contract. Notificare also charges a one-time fee for the setup process which can take between 8 and 12 weeks. To request these numbers or find more information and pricing, please contact us.
SMS Numbers
In the following section, go ahead and click in the Add Number button to proceed to choose one or more phone numbers:

That will open the following window, where you should select a country and click the numbers you want:
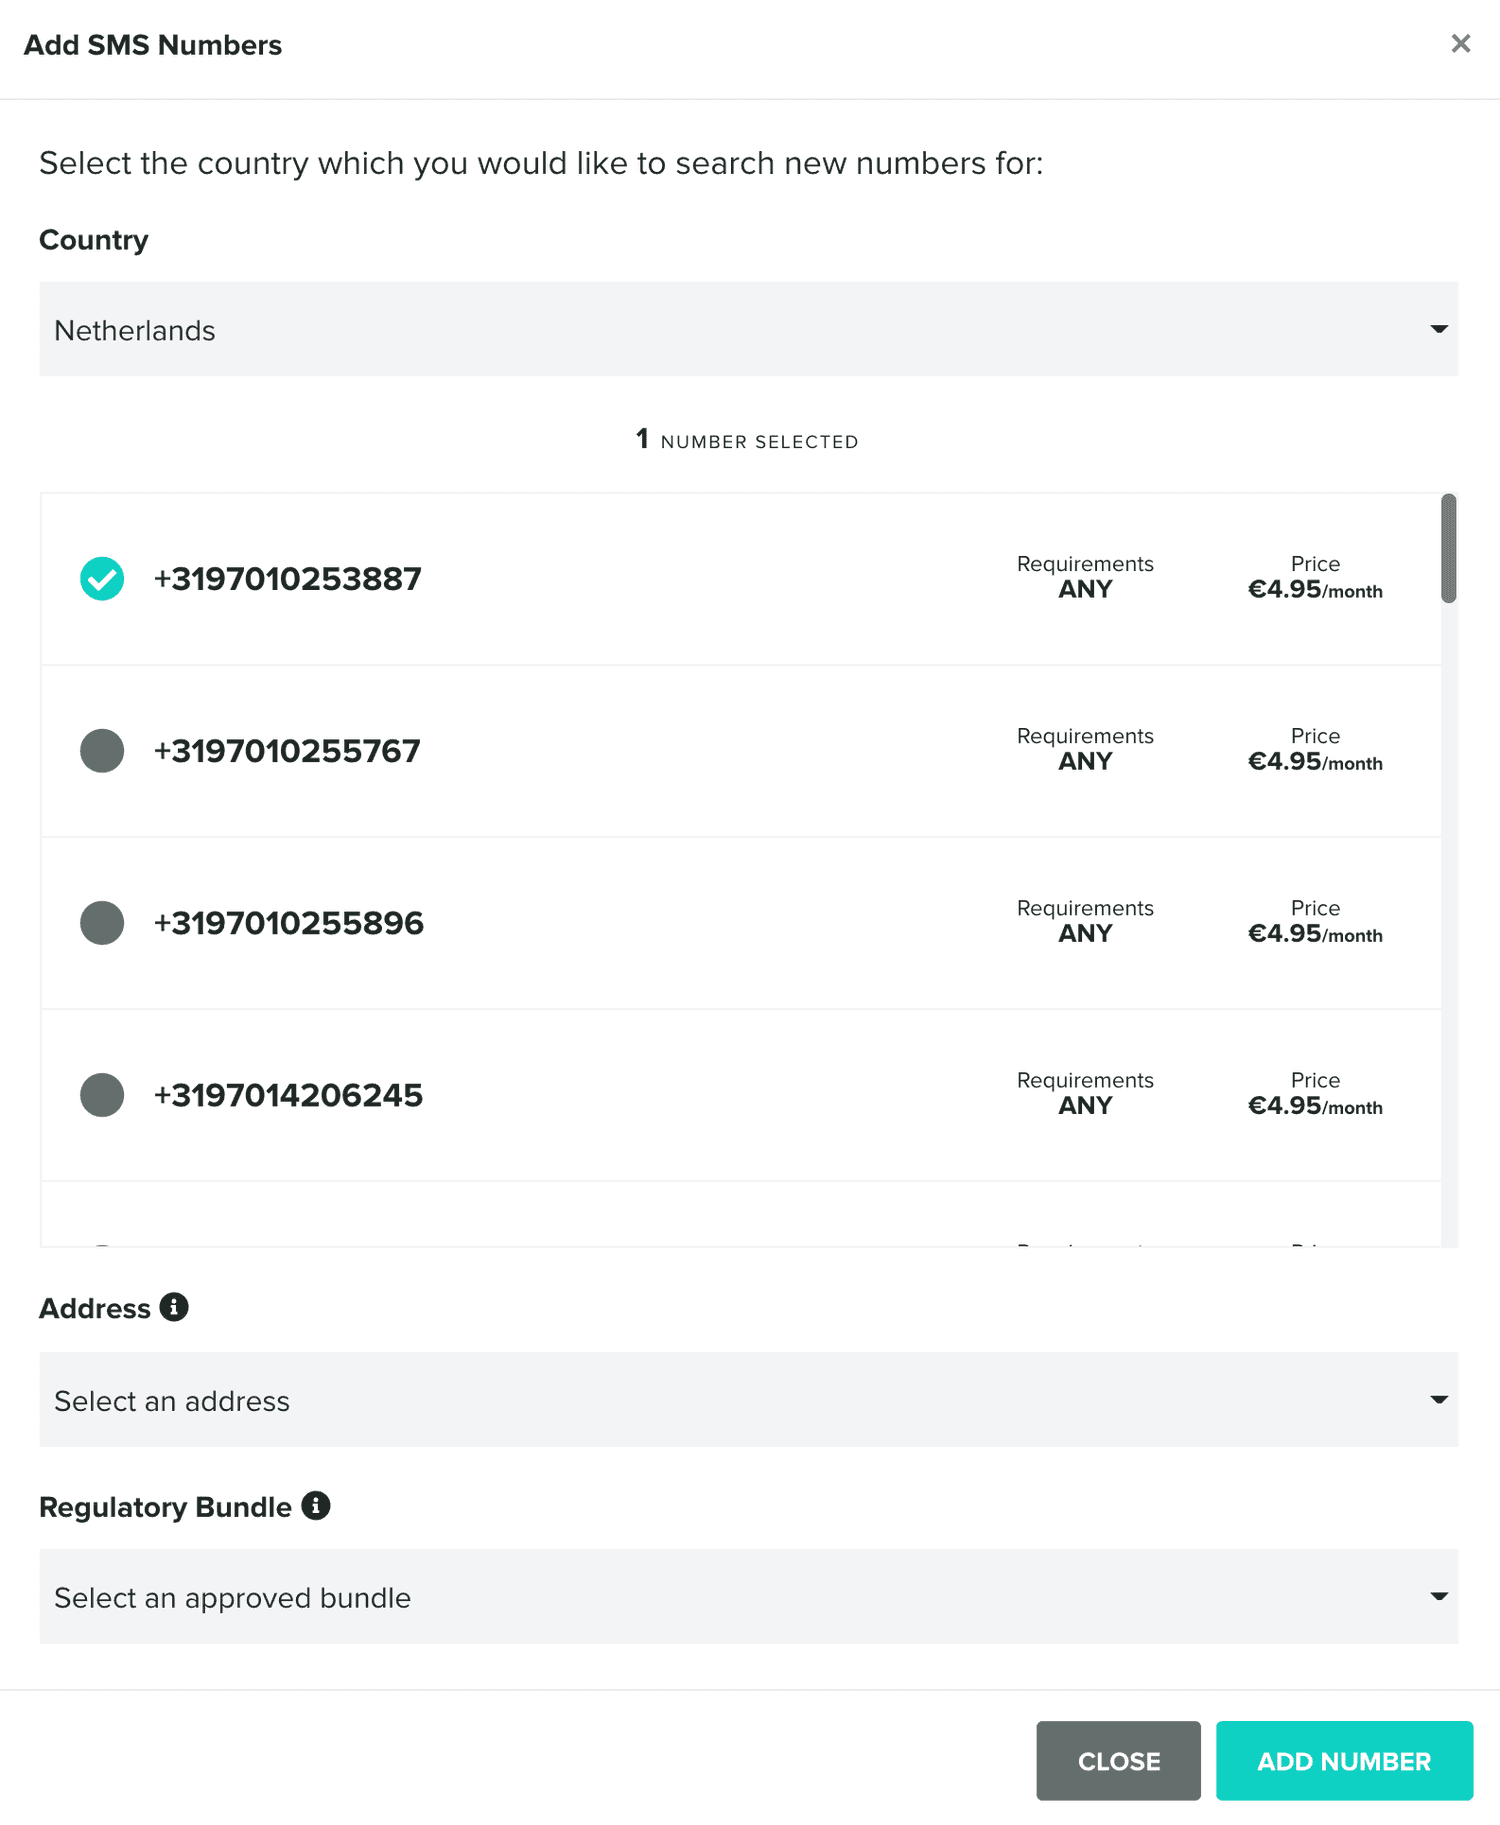
If the numbers you've selected have None as the requirements, you can buy them by simply click in the Add button. This will automatically charge your payment information in vault and add the number as follows:

If instead, the numbers you've selected have Any or Local as a requirement, you will need to provide an address and a regulatory bundle before you can proceed. Please continue reading to learn how to add those too.
SMS Pricing
In this area, you will always be able to check the cost of each text message. The price of a message varies according to the recipient country. Use this area to find out how much you will be charged for each message you sent:

SMS Sender
Optionally you can also use a Sender Name. This value will be used as the Sender ID address of your messages instead of the phone number. To add one, simply provide a name and click in Save. You can always change this value at any time.

Please note that the Sender Name allows you to set your company name or brand as the Sender ID when sending one-way SMS messages to supported countries. This name may be up to 11 characters. Accepted characters include both upper- and lower-case ASCII letters, the digits 0 through 9, and space: A-Z, a-z, 0-9. They may not be only numbers.
Addresses
An addresses is mandatory to buy a phone number in a country where regulators requirements are defined as Any or Local. In the following section you can do exactly that:

If you click in the Add button you will find a window as follows:
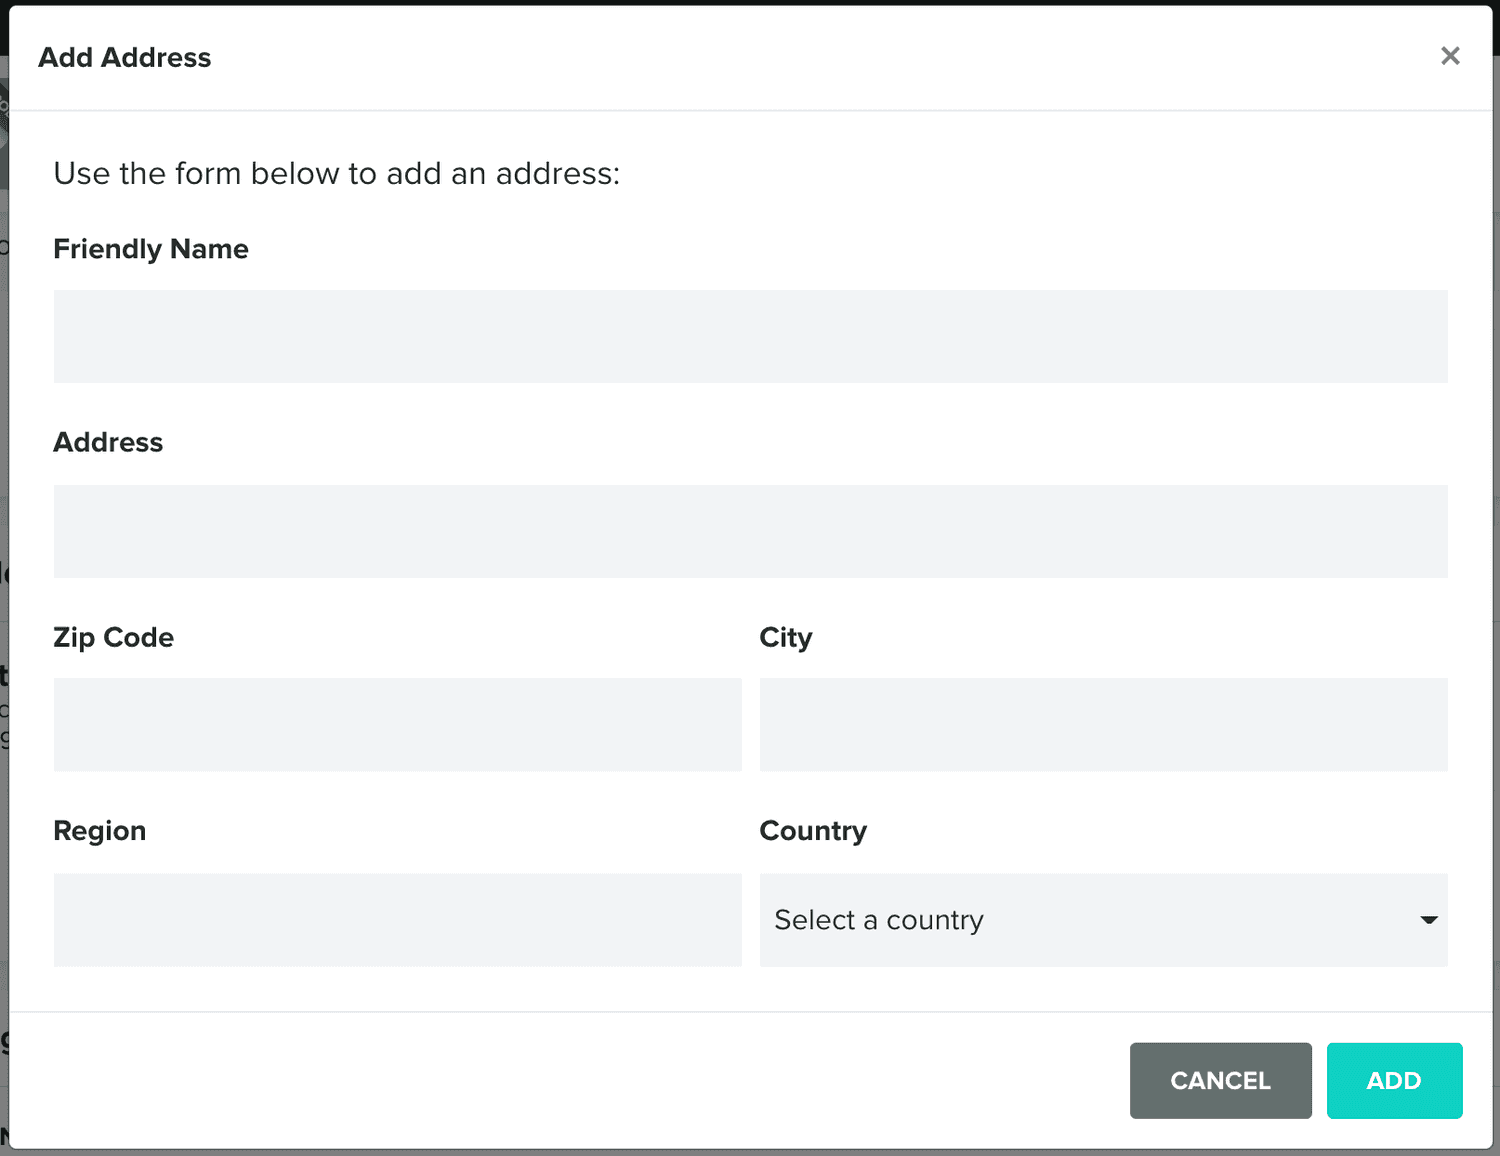
You should provide all the required data and click in the Add button to complete this operation. The address will then be displayed in the list below:

You can then use these when buying phone numbers with Any or Local requirements.
Regulatory Bundles
For some countries, you will also need to provide additional information in order to buy a phone number. This will need a bundle comprising of business information or documentation subject to local regulator's verification. When that is the case you should use the following area:

You should start by first checking what are the requirements needed in the country you intend to buy phone numbers from. This is done by clicking the Regulations button and by selecting the country you want:
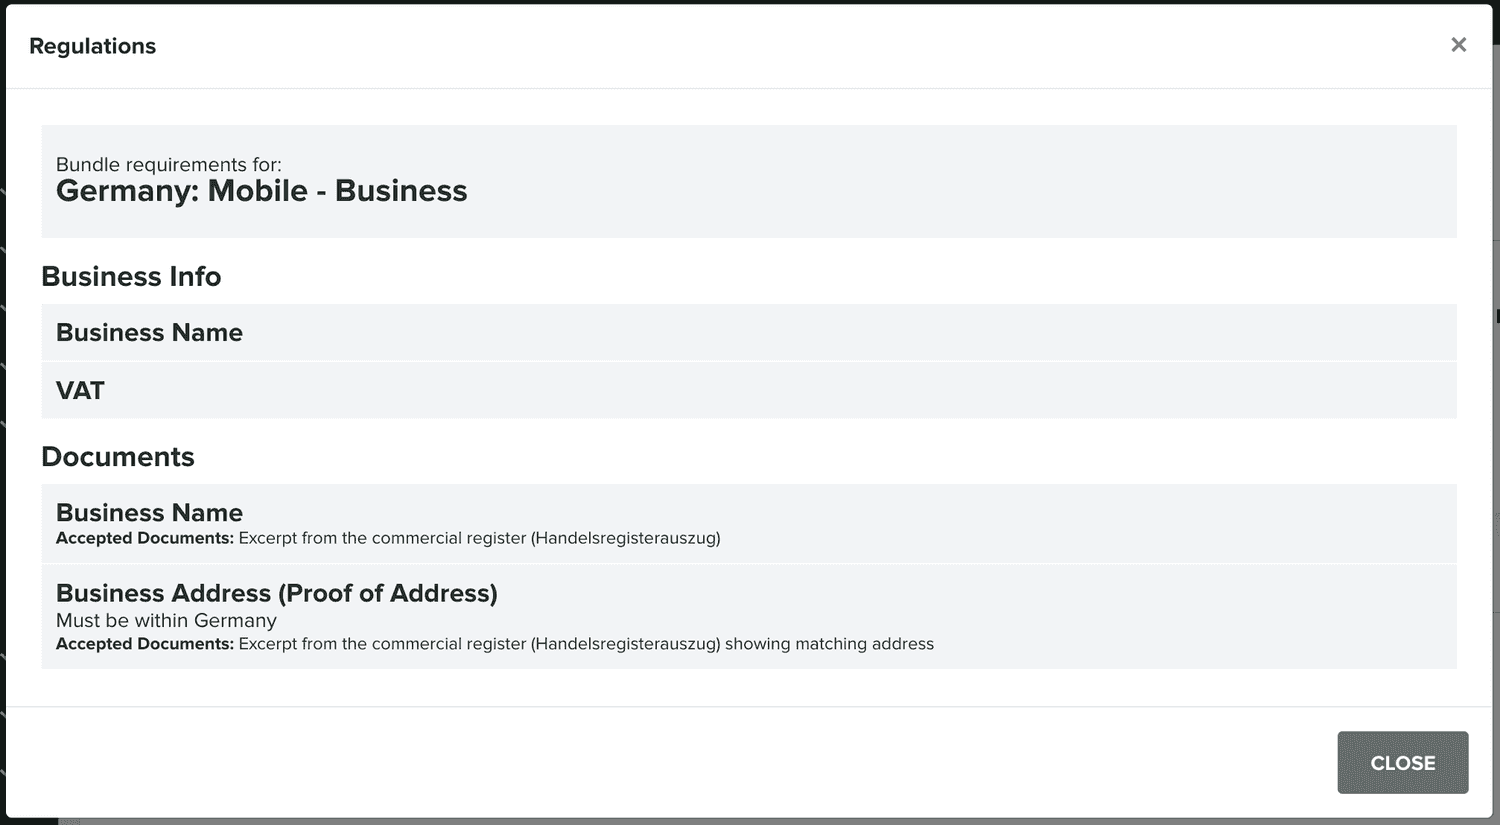
If the country you want does require a business entity information and documents, you should then start by adding those. For example, to add a business entity, click in the Businesses tab, and in the Add button:

This will open a window where you should again select the country you want and provide the information required, as follows:
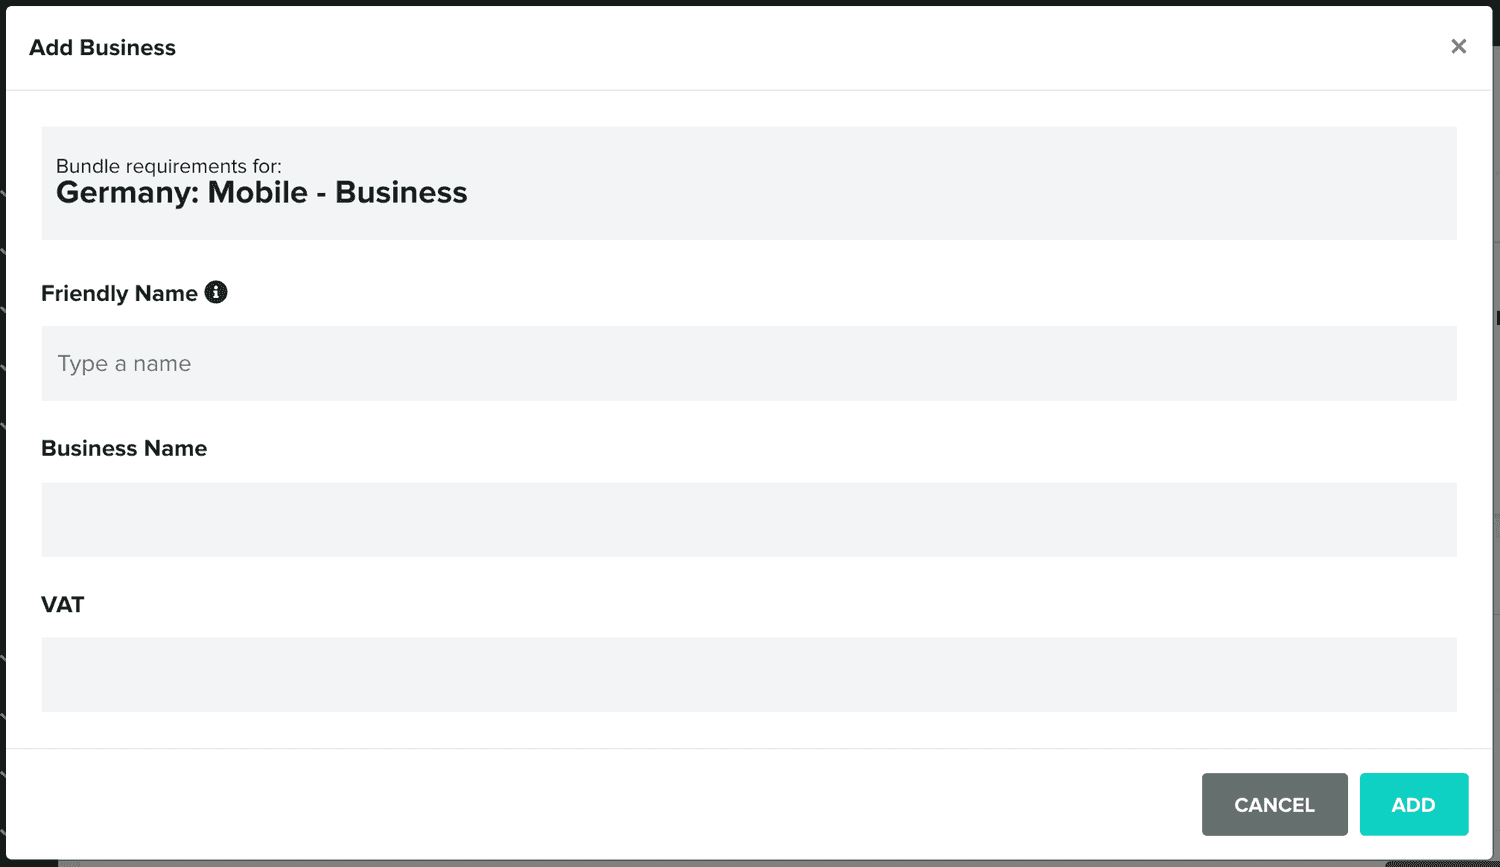
The process to add documents is also very similar, click in the Documents tab and in the Add button:

This will open a window where you should again select the country you want and provide the document required, as follows:
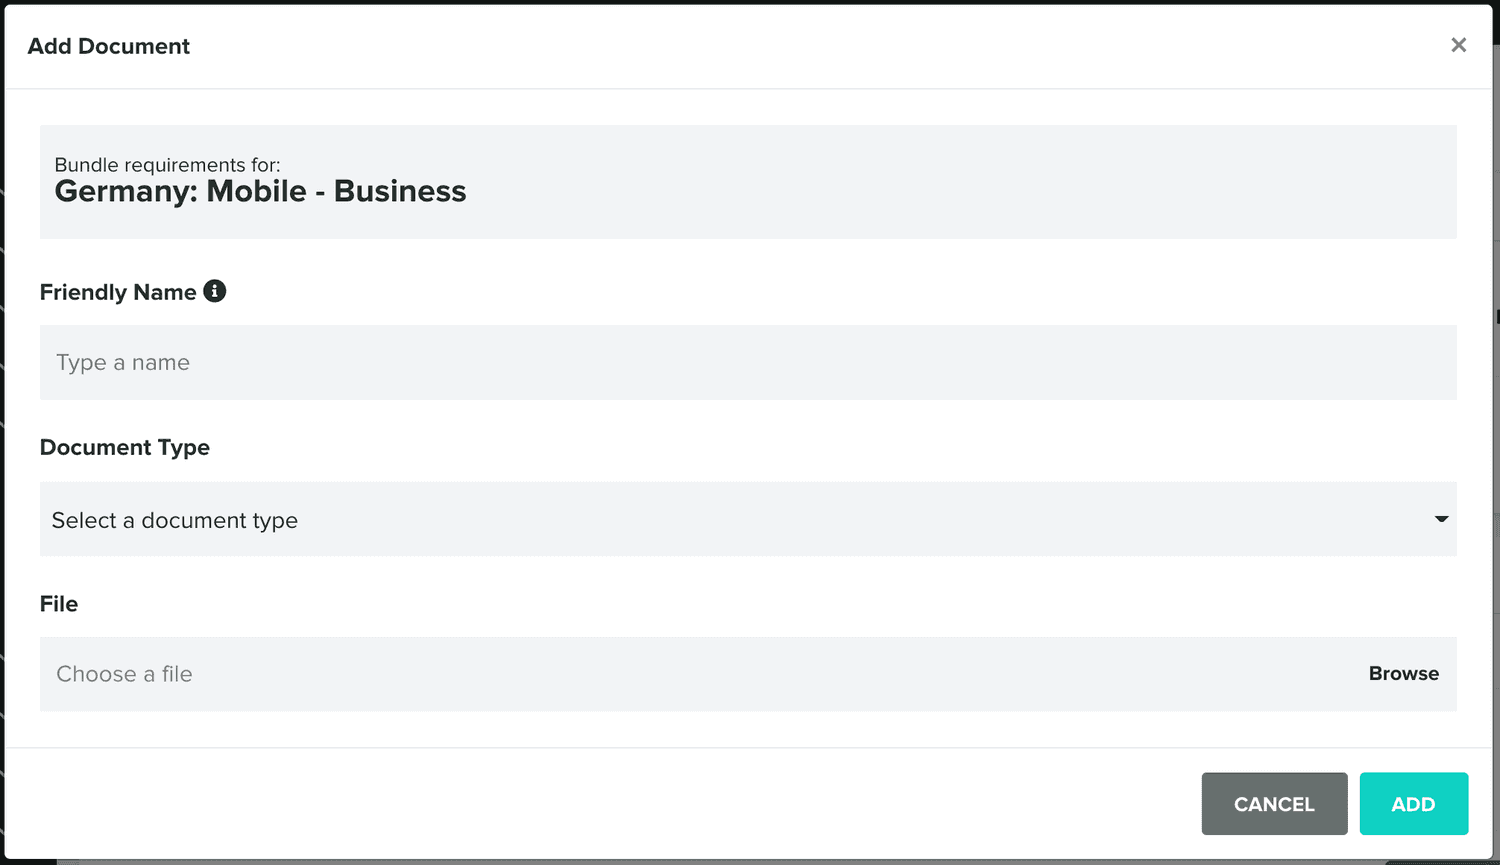
You should repeat these steps for each document required in those countries.
Finally, you can go ahead and add the bundle, which in fact is the combination of the business entity and documents you've previously added. This is done in the Bundles tab by clicking in the Add button:

This will open a window where you should again select the country you want and select the business entity and documents you've already created, as follows:
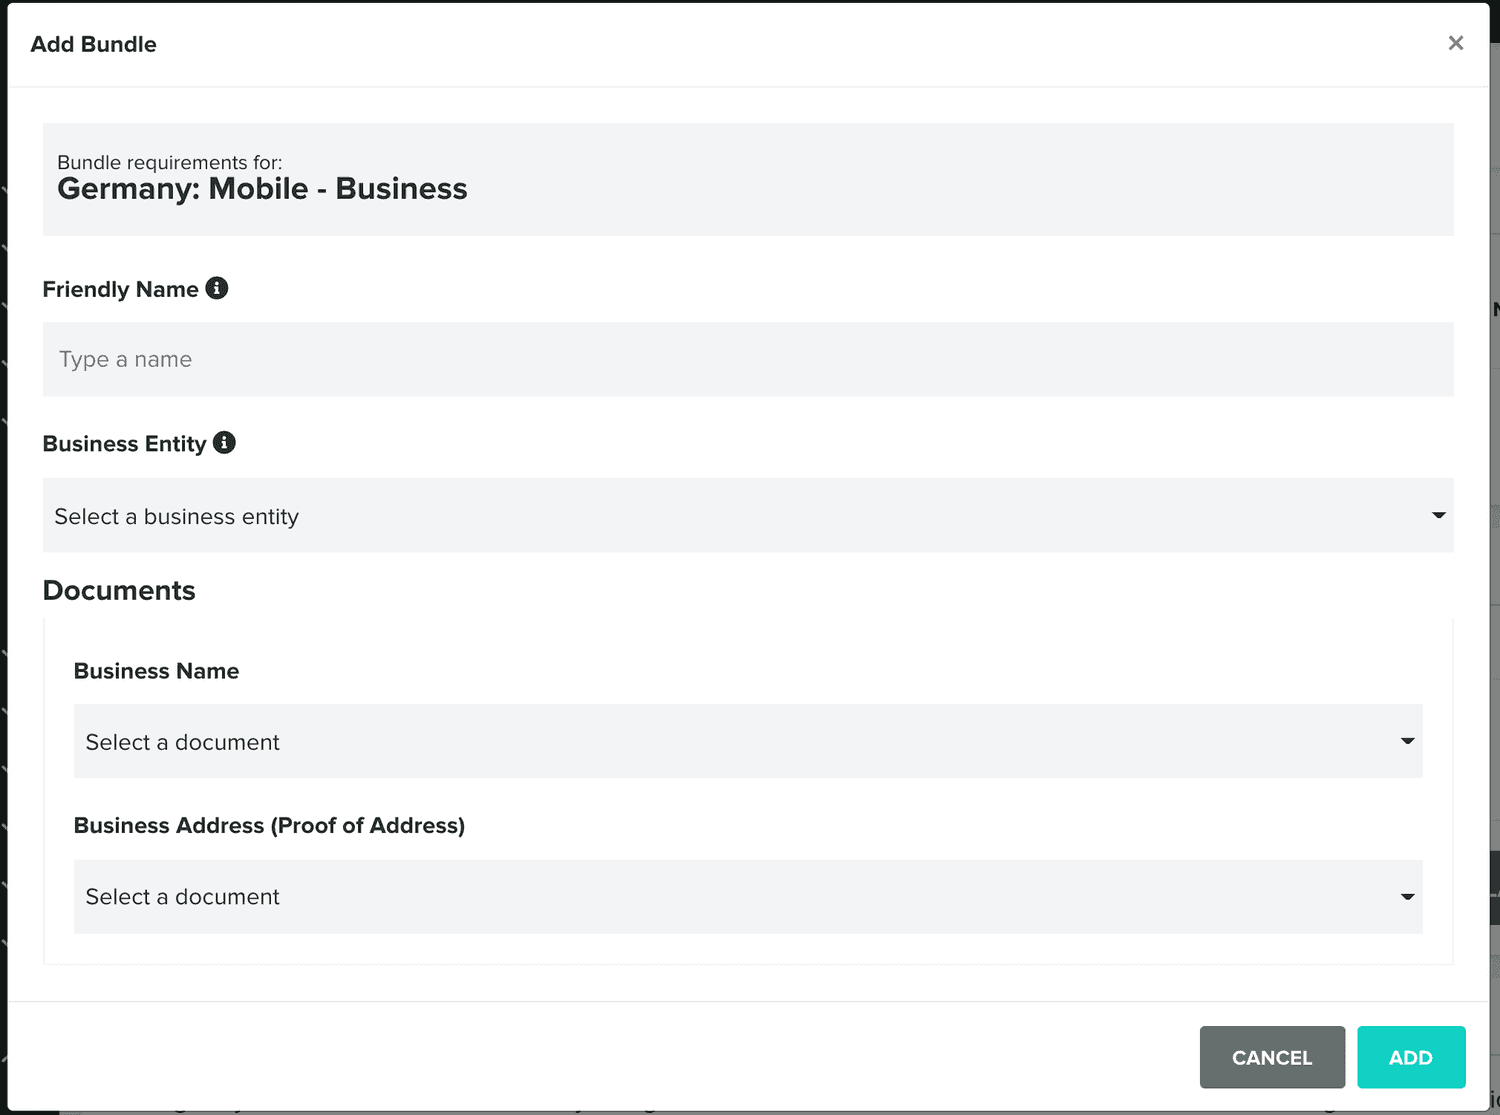
Once you've create a bundle, you can then update its name or, if you are ready, submit it for verification:
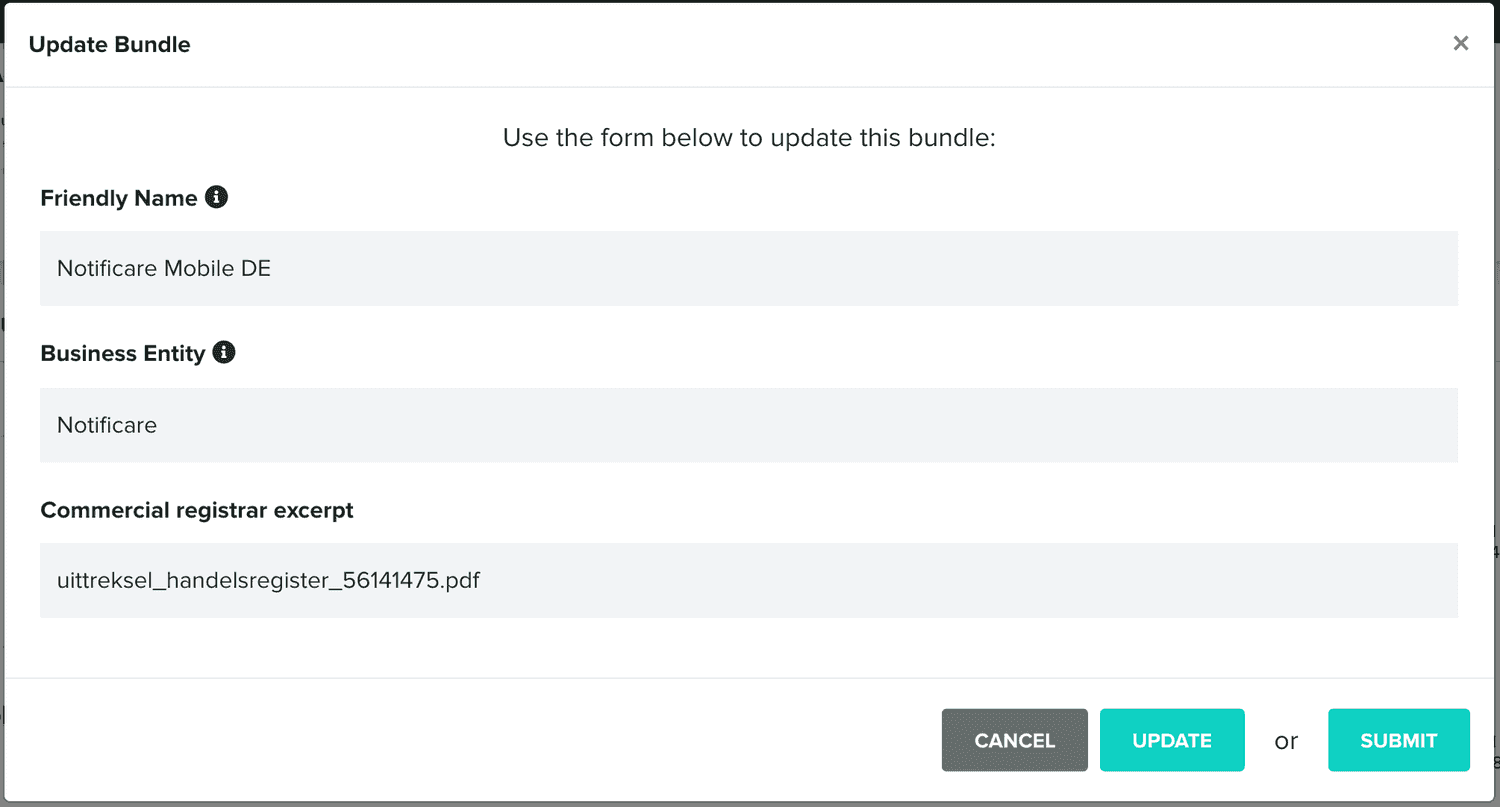
The state of your bundles will be displayed in this same section, as follows:
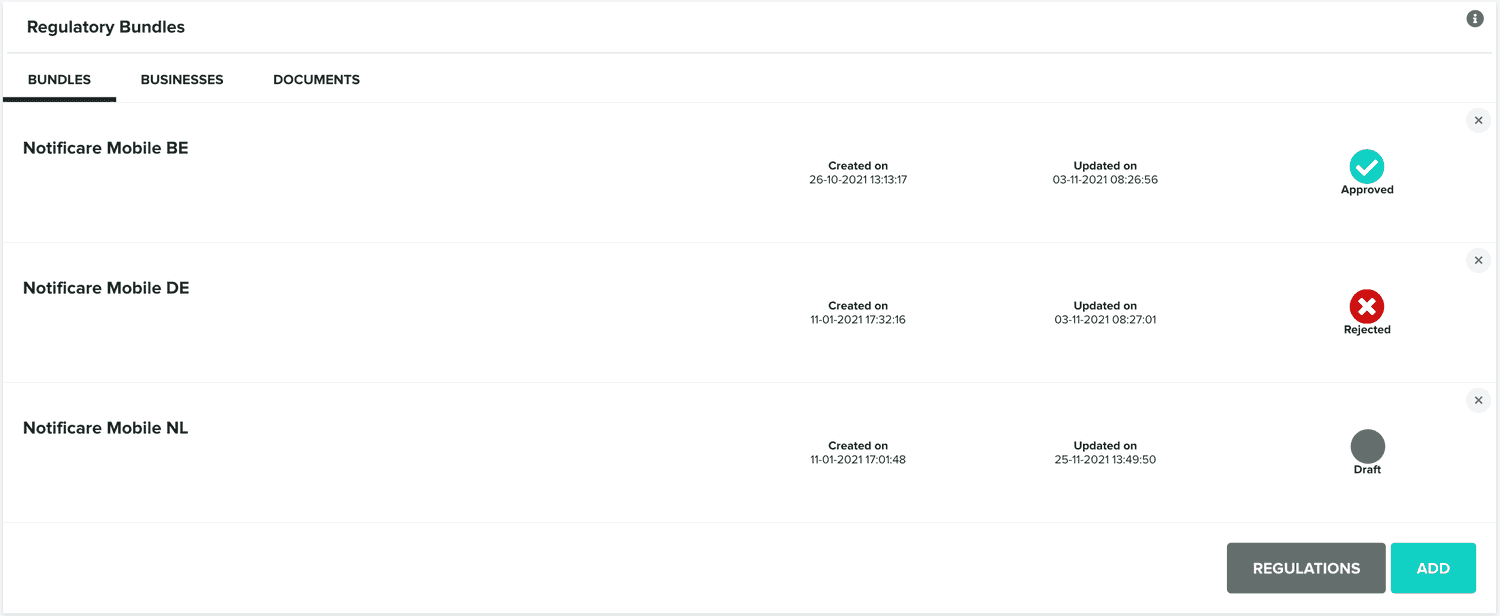
Once your bundle is approved for a certain country, it can be used to buy one or more phone numbers in that country.
SMS Settings
Finally you can start configuring the default messages we will send when users subscribe phone numbers in your app. The first field in this section is a read-only value, you might be requested to present us this identifier when using our support channel.

If you want your default messages to be localized in other languages, go ahead and toggle the option below:

Then provide a text that will be used in the validation message that we will send when new users subscribe to your app (make sure you include the {{validateLink}} placeholder):

To allow you to customize your users' experience, you should provide a public URL that will be used to redirect users when the validation is successful:

Then provide a public URL that will be used to redirect users when the validation returns an error:

Because you will want to also provide a way for your users to unsubscribe, you need to also provide a public URL that will be used to redirect users when the unsubscription is successful:

And finally you need to also provide a public URL that will be used to redirect users when the unsubscription returns an error:

Providing both a success and error URLs, will allow you to include the {{unsub}} placeholder in your text messages.
If you choose to localize these values in other languages you need to go ahead and fill all these values for each language. In the end do not forget to hit the Save button to store your changes:

Once you have finished setting up all these settings, your service will be active and ready to be used.
After that, you can also implement a form to capture phone numbers in your website or apps. To accelerate this process we've developed a ready-to-use solution that you can quickly copy and past in your websites:
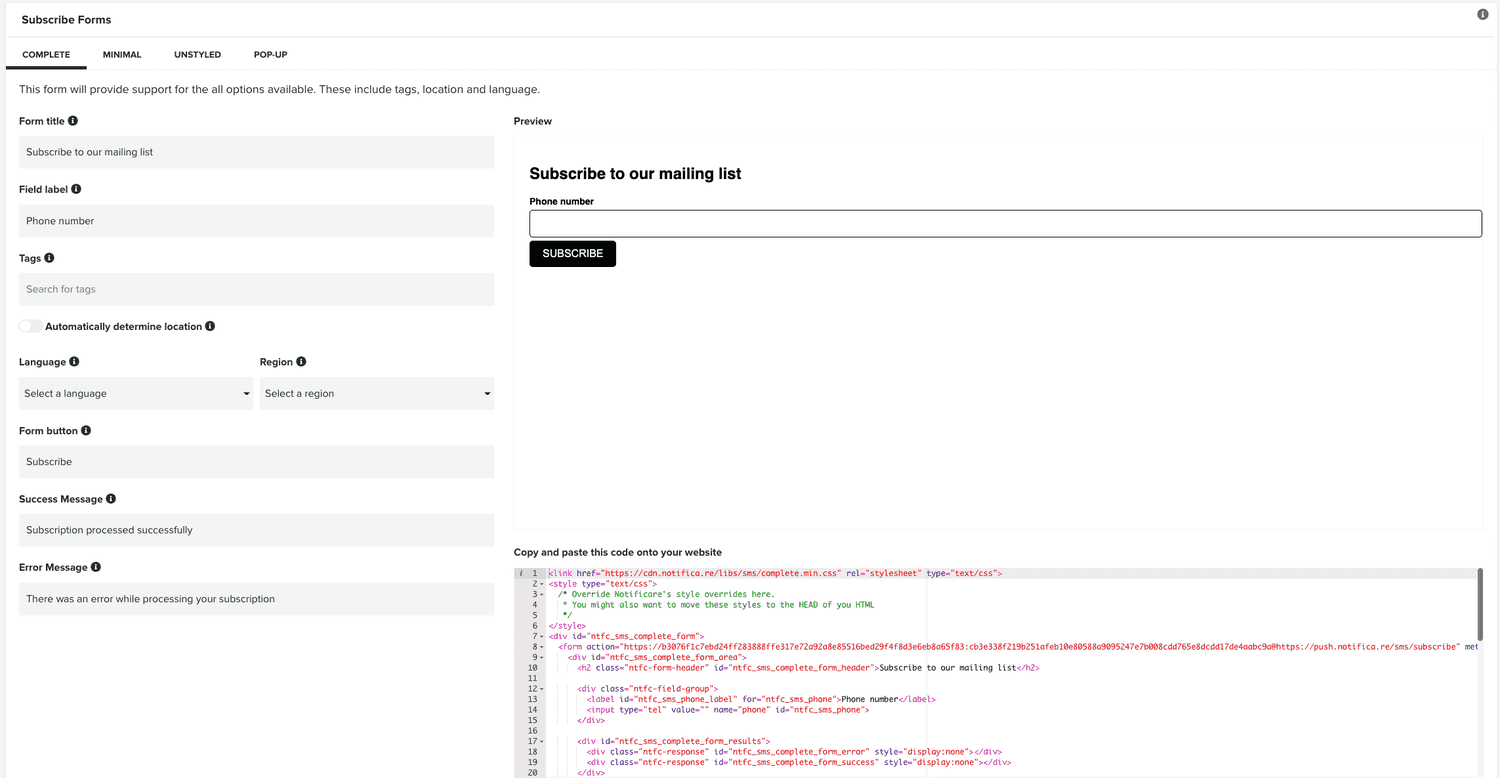
Simply select one of the options available and include it in your website, you will be ready to start capturing phone numbers in no time.